Tools Used:
- Adobe After Effects
- Microsoft 3D Movie Maker
- Mixman Studio
- Swift3D
- SwishMAX
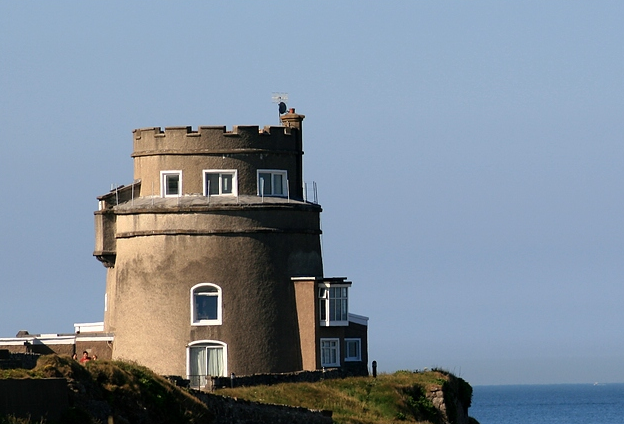
Occassionally I am asked to do multimedia projects such as DVDs or other assorted video projects. Way back in 2003 I figured I should design a nice movie production type intro to put at the beginning of these videos. I mapped out a storyboard which would tie in with the theme of my logo. The clip would start with a basic flyover of a seascape with an impending storm heralded by the occassional flash of lightning and low rumbling of thunder. The camera would then slowly zoom into the iconic castle on the rocks. When the camera gets really close there would be a final flash of lightning and loud thunder clap and the real shot of the castle would be replaced with the Tempest Towers logo.
Now that I knew what I wanted I had to decide what tools and resources I required to make this happen. I decided to render the main movie using the realistic raster effects of Swift3D’s 3D animation software. For the thunder sound effects I remembered that Microsoft’s 3D Movie Maker CD (from way back in 1994) had an extensive library of sound effects I could use. This was the only thing I used this ancient software for since at the time I couldn’t even install it on my computer. In addition I didn’t have to scour the internet for free sound effects. For the background music I initially wanted to use some Celtic music and originally had the opening to Enigma’s “Celtic Dream” slated. However I figured, although unlikely, I didn’t want to be caught using copyrighted music in any of my branded material. The next best thing was to borrow my brother’s Mixman Studio software and compose something similarly ethereal from scratch.
Rendering the 3D Movie
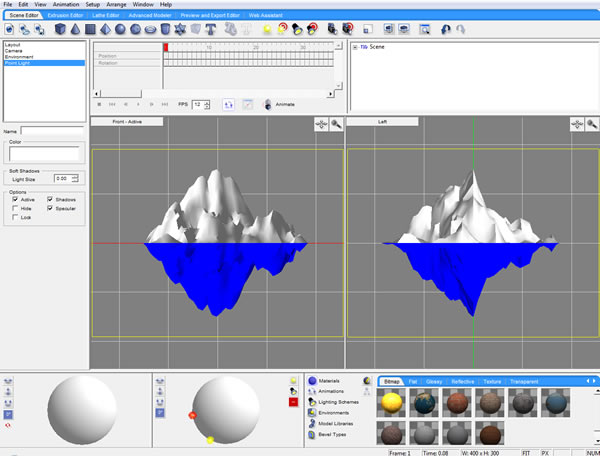
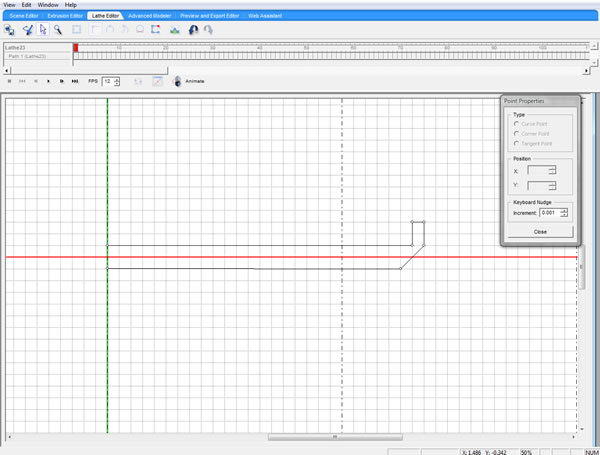
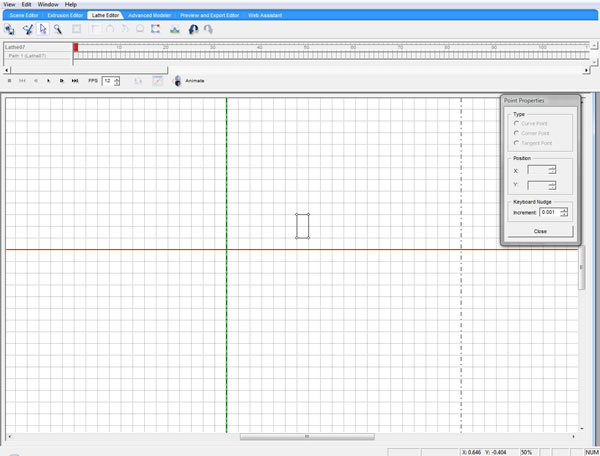
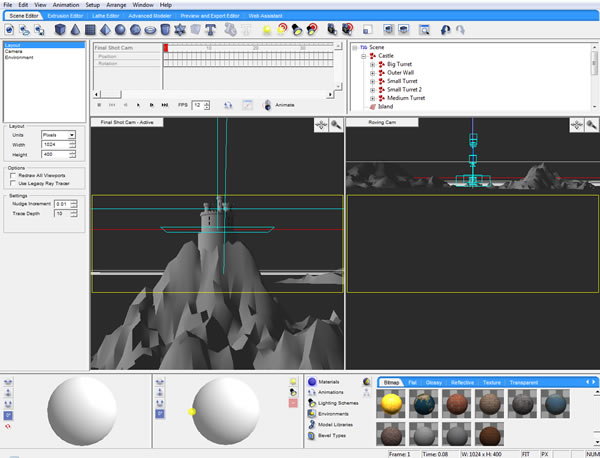
My next step was to create a camera and map out a path for it to follow within the scene. This would essentially be the camera view that would be used in the final video. Swift3D renders the movie like any video camera and basically connects up multiple still shots in sequence. After rendering the movie I had to re-render a few of the frames again but this time I placed a light source in the extreme background in order to create harsh back lighting. These frames would represent when the lightning is flashing.
Putting it All Together
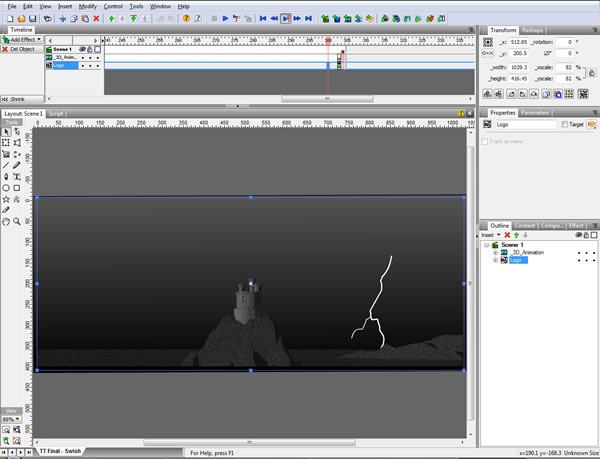
All of the rendered frames were then imported into SwishMAX where I would first change it into a Flash video, edit in the final effects and then use SwishMAX’s exporter to change it into an AVI file. Using SwishMAX I inserted the backlit lightning flash frames at the appropriate points and also drew in the lightning bolts ontop of the scenes. Additionally the thunderclap sound effects were added in the correct spots (allowing a short delay after the lightning flashes). At the end of the video I added the logo overlay, replacing the 3D scene. Finally after composing a short music clip in Mixman (which became more Hindi than Celtic) I added in the background music and created the AVI file.
Final Touches
Unfortunately SwishMAX didn’t have the best Flash video to AVI conversion at the time. No matter how I rendered the movie it was full of artifacts and other unsightly glitches. Rather than abandon the project or pay for more high powered software, I decided to take advantage of the ugliness of the final product and make it worse. By this I mean I decided to run it through the “aged film” filter in Adobe After Effects. This particular filter adds scratches, graininess and burns onto the video. This was enough to cover most of the short-comings of SwishMAX’s AVI conversion and left me with a fairly decent final product shown below.


I just finished watching the new computer animated Tintin movie and I saw the iconic castle from “The Black Island” in the opening credits. This would appear to be where I got my original concept for the Tempest Towers logo however I don’t remember owning any of the Tinitn books back in 2002 when I came up with the concept. I own them all now but prior to recently borrowed them from the local library when I was a kid. Definitely I can’t miss the similarities and it does seem to ring a bell when I look at Herge’s drawings now. Maybe I’m just getting old….