In May 2015 I was planning on hiking the Himalayas. However a week before my departure on April 25, 2015, Nepal suffered a massive earthquake scuttling my plans. Because I had spent the last few months training and 2015 was my year to visit Asia I searched my list of destinations for an alternative. Fortunately Japan was on my list and Mt. Fuji was a reasonable climb to attempt. At a modest 3776 meters, with well-managed trails and infrastructure, most climbs can be accomplished over a 24 hour period since they start roughly halfway up the mountain. My Himalaya trek would have taken me a little beyond Namche Bazaar (3440m) so elevation-wise this would be comparable. My next decision was to choose a hiking company to go with. Although you can hike alone there are advantages to using a tour guide company. Namely they take care of transportation to the mountain, overnight lodging, meals, hiking fees and equipment rentals. The company I eventually settled on was Fuji Mountain Guides. Their guides consist of English speaking Westerners who grew up or have lived in Japan for some time.
Equipment
- Hiking boots – The most essential piece of equipment is your boots. I used Timberland Euro Dub Boots which offer good ankle support and waterproof protection. I supplemented this with thick Dr. Scholl’s massaging gel active insoles for maximum comfort and Thorlo Wool/Thorlon Thick Cushion Hiking Socks to keep my feet warm. I have owned these boots since 2013 so they were well worn in. Although you can climb in sneakers one guy I climbed with had both soles of his sneakers fall apart on the descent so good footwear is a must.
- Hats – You will need two hats. A sun hat for the sunny days to avoid sunburn and a warm hat for the cold nights. I used a No Fear Boonie Hat which I have owned since my days in the army. For the night I used a The North Face Fleece Beanie that I used in Antarctica.
- Tops – The days on the mountain can be very warm even at altitude but extremely cold at night (average 3 degrees Celsius). As a result you want to dress in layers. My base layer was simply a Nike Compression shirt for the day. As evening approached and I climbed higher I added the UnderArmour ColdGear Infrared 1/4-zip Mock an extremely lightweight fleece pullover that reflects your body heat back towards you (most effective when you are active). During the night I added a wool cardigan sweater to stay warm as I slept in the mountain hut.
- Bottoms – I wore a single layer for bottoms, simply Blackhawk Lightweight Tactical Pants. These are durable poly/cotton pants that are equally comfortable in the heat and cold and have plenty of accessible pockets to hold your gear. The only problem I had while climbing though was the steep 40-50 degree gradient meant lots of high stepping. This resulted in excessive rubbing of my knees on the inner fabric.
- Gloves – These come in handy during the cold nights. I used 5.11 Tactical Mechanics Gloves which although are not meant for extreme cold were sufficient for these temperatures.
- Headlamp – As you are required to hike in the dark to make the summit by sunrise, a flashlight is recommended. A headlamp is preferable as it frees up your hands for other things such as your hiking poles. I used Northbound Trains Ultra-Bright LED Headlamp.
- Sunglasses – As it can be very bright during the day sunglasses are recommended. I used Global Vision Kickback Motorcycle Glasses which have the benefit of padding around the eyes (to keep the wind out). This is useful during the descent in keeping dust and dirt out that is easily stirred up by other hikers. I chose the yellow lenses so I could also wear them at night.
- Face mask – During the descent the loose volcanic dirt is easily stirred up and can create a cloud of dust and dirt if you are walking with a large crowd of other hikers. A face mask helps you to breathe a little easier. You can end up with quite a bit of dirt in your eyes, nose and mouth otherwise.
- Gaiters – Also during the descent the loose volcanic dirt is a few inches deep and similar to walking in snow. Gaiters are useful to keep rocks out of your shoes. I used Outdoor Research Rocky Mountain Low Gaiters.
- Rain gear – Normally it always rains on Mt. Fuji. As such you should come prepared for the rain. Rather than pack my own heavy duty rain gear that I used in Antarctica, I rented a lightweight more compact rainsuit from Fuji Mountain Guides.
- Hiking Poles – I highly recommend using hiking poles. They not only take the stress off your knees and back but are good for resting on when tired. Make sure you learn how to effectively use them. I YouTube’d a few videos for instructions. The main thing is to have your arm at a 90 degree angle when using them. This means shortening the poles on the ascent and lengthening them on the descent. I rented a pair from Fuji Mountain Guides.
- Backpack – You will need a sturdy (but not too large) backpack to carry all of your equipment. I used the OGIO Metro Backpack I had recently received as a promotional gift from a vendor. I tried to keep the weight of all of my equipment under 20 lbs. Also to keep my equipment dry I placed all of my equipment in ziplock bags or in the main compartment in a trashbag.
- Water & Snacks – You should have at least 2-3 liters of water for the climb although there are plenty of mountains huts along the way where you can buy water (more expensive the higher you climb). I had a mix of water and Aquarius a sports drink with a light grapefruit flavor (I preferred this over the more common Pocari Sweat). Water is scarce on the mountain and has to be either carried up the mountain or stored in catchments from the rain. This means you will have to use some of your own water for washing up and brushing your teeth. So don’t pack only sports drinks 🙂 I also had two small packs of Planter’s Honey Roasted Cashews and a Meiji chocolate bar for quick energy. *Be careful with sealed packages like bags of potato chips or peanuts and even your bottled water (if half filled). As you climb higher they will inflate like balloons and can burst if you are not careful.
- Money – You will need some money for souvenirs, water and snacks which can be purchased from mountain huts but more importantly you will need money in order to use the bathroom. Toilets are about 200 yen per use so have enough 100 yen coins on hand for this purpose. It’s also probably a good idea to bring your own toilet paper (just in case).
- Miscellaneous – I took a small Sea to Summit DryLite Towel. This is a small, compact microfiber towel that is highly absorbant and fast drying. It folds up into a convenient 5″ x 4″ pouch. Fuji Mountain Guides also provided a “gift pack” which consisted of an eye mask, ear plugs, gloves, face mask, wet wipes, a hand warmer and a Japanese bandanna.
- Insurance – Lastly you will need travel insurance. I use World Nomads as they provide insurance specifically for extreme activities.
The Hike
Hiking season on Mt. Fuji is from early July to mid-September when most if not all of the snow has melted and conditions are safer and warmer to climb. In addition all mountain huts are open during this time. There are four hiking trails on Mt. Fuji. Each trail is divided into roughly ten stations where the first station is at the bottom of the mountain, the fifth is about mid-way up the mountain and the tenth station is the summit. I say roughly since stations have been built over the years in addition to the original ten stations meaning there could be two seventh stations not far from each other. At each station there could be a small store, restaurant or a place to sleep. Most hikes up Mt. Fuji will start at the fifth station. Fuji Mountain Guides uses the Subashiri Trail rather than the more popular Yoshida Trail. The Subashiri Trail is less crowded and particularly on the descent this means not hiking through a cloud of dust and dirt stirred up by a mass of other hikers. The other advantage is the Subashiri Trail always faces the east meaning if you are unable to make the summit, you can still see the sunrise from wherever you are. The trail is also greener further up the mountain than the other trails with the trailhead heavily forested. This means more shade at the the start of the hike. The down side is the trail is less developed and the Subashiri Trail 5th Station starts lower down on the mountain so the hike is slightly longer. Fuji Mountain Guides does its main pickup at 6:15am from the Keio Plaza Hotel in Shinjuku which was where I stayed for most of my time in Tokyo. From there you are taken on a 2 hour drive to Mt. Fuji for a 10am start up the mountain. The goal for the first day was to hike from the Subashiri Trail 5th Station (1950m) to the 8th Station Fujisan Hotel (3400m) by sunset. Around 1am you are woken up in order to make the summit for sunrise. After sunrise you make your way down the mountain to begin your return to Tokyo by 12pm. 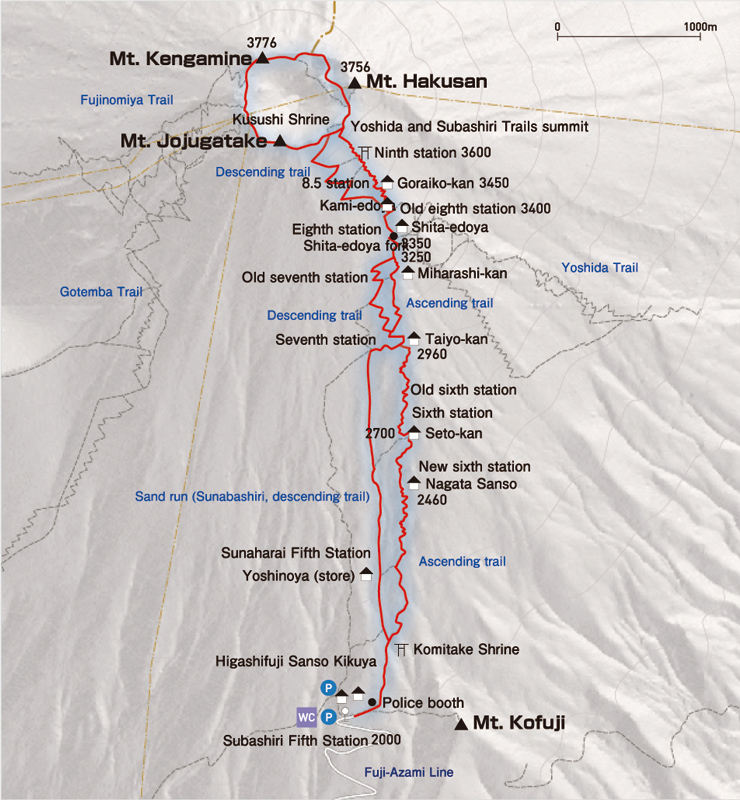
The Ascent
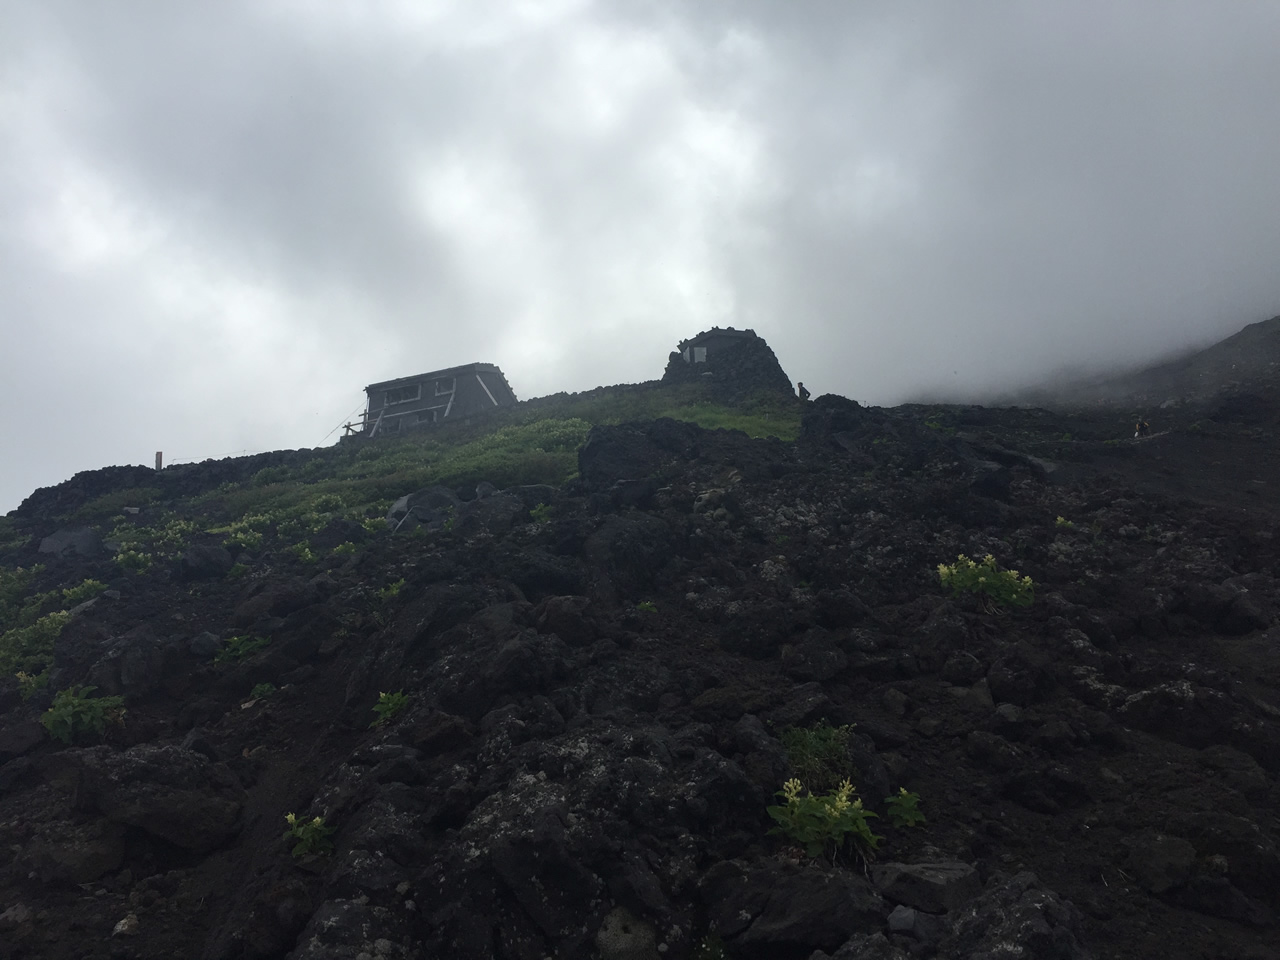
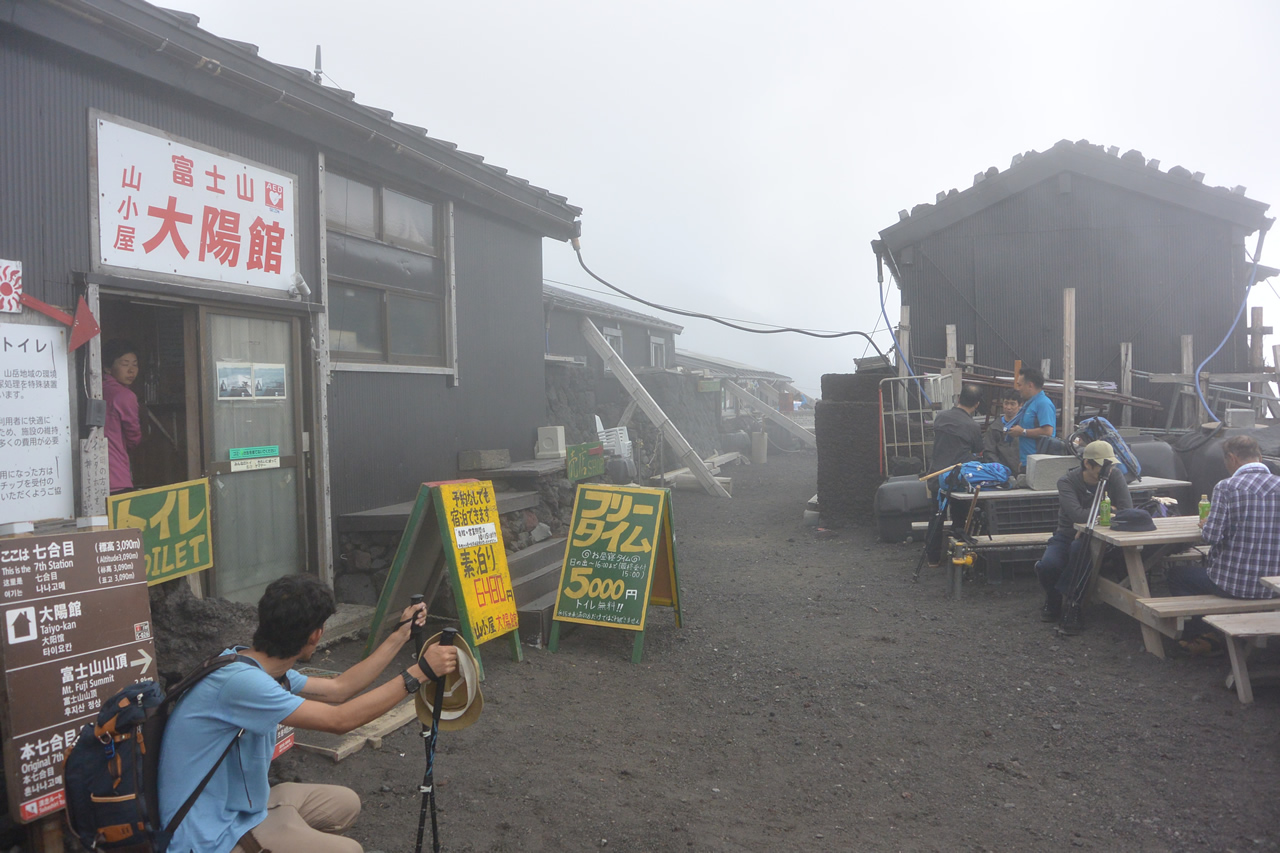
The highest mountains I had climbed prior to Mt Fuji was the Blue Mountains (2256m) in Jamaica and Whistler Mountain (2181m) in British Columbia, Canada. The highest point in Bermuda is 76m so the most I could do to train was practice walking up a 50m hill. At around 2500m most people will experience adverse health effects regardless of age, gender or fitness level. You don’t know how you will be affected until you are actually at that altitude. Altitude sickness prevention drugs such as Diamox are usually not required for Mt. Fuji since you rarely stay on the mountain for more than 24 hours. Some mountain huts sell small cans of oxygen which can help with the lack of oxygen at altitude. Since Japan has excellent mobile phone coverage (LTE) even on Mt. Fuji, I purchased a data-only SIM card from cdJapan with an unlimited data plan. This allowed me to track my ascent using MapMyWalk. 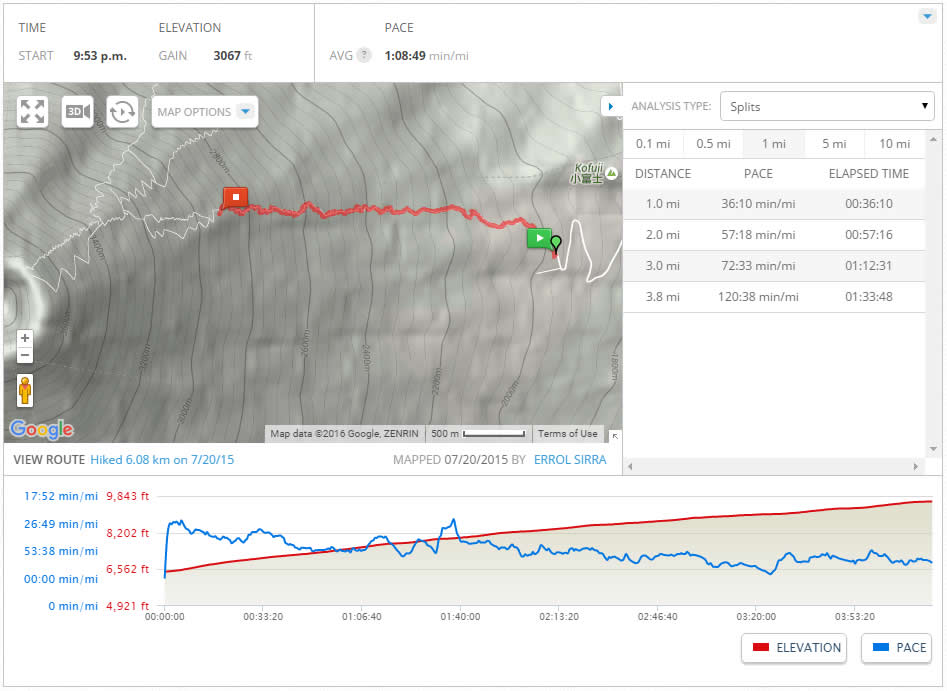 I hiked from about 10am covering 3.78 miles in 4 hours and 20 minutes to an elevation of 3090m. In short I didn’t make it to the summit. I started out at a good pace for the steep terrain which varied from 40-50 degrees in gradient. I did the first mile in a little over 30 minutes (2mph pace – I do 4mph at sea level). Between 2200m and 2400m my pace dropped down to 1mph. Finally above 2400m I was going 0.5mph on average, literally stopping to catch my breath every 10 meters near the end. Although I was tired, this was still a strange feeling of fatigue. My heart rate was 138 which is typical for when I am hiking and in theory I felt like I had enough energy. What I didn’t have was enough oxygen (probably should have bought a can of air). The only way I can describe it is like being in a car with a full tank of gas but being stuck in first gear. It was more frustrating and boring than painful. By the time I reached the 7th Station Taiyo-kan (one of the new 7th Stations) at 3090m I had pretty much decided to call it quits – after all I was on vacation. It was only a little after 3pm so I had 3-4 hours of daylight left to reach the 8th Station which was about a mile away and another 300m in elevation. However doing that final mile would have probably taken me another grueling 2 hours or more, something I didn’t want to endure. By this point I was at the tail end of my group with only the rear guide waiting for me at the 7th Station. I asked him if this was a good place to stop and he actually recommended this one over the next two stations (the original 7th Station and an 8th Station before reaching the 8th Station Fujisan Hotel). Taiyo-kan was manned by a young team of Japanese who spoke English and were well-travelled and my guide highly recommended the food (much larger portions of meat than anywhere else). With that endorsement I decided to stay and my guide made arrangements to reserve lodging, dinner and breakfast. The rest of the group would meet me on the way down the next morning. In addition our lead guide had advised us when we started that even if we didn’t make it to the summit, “the sunrise looks the same from the 5th Station to the summit” (that statement probably also played a part in me bowing out early). *Apologies for the mixed Imperial and Metric units. Bermuda uses a mix of Metric and Imperial and most schools teach both. While officially most signs will be Metric, most people will use Imperial in practice.
Taiyo-kan
The mountain huts on Mt. Fuji are very basic and functional. They are little more than a longhouse split into the following sections:
- Bathrooms
- Shoe room (a place to remove your boots and gear)
- Sleeping area
- Dining area
- Kitchen
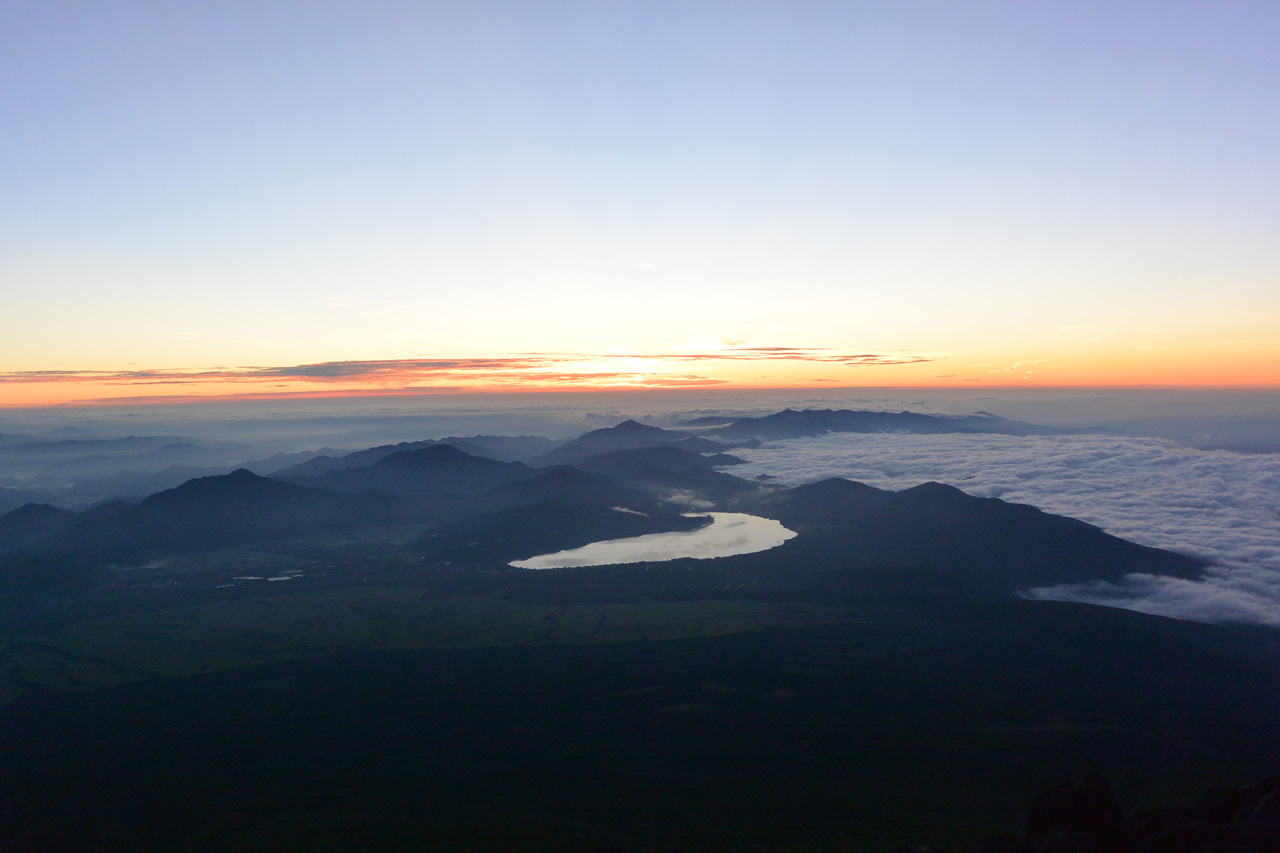
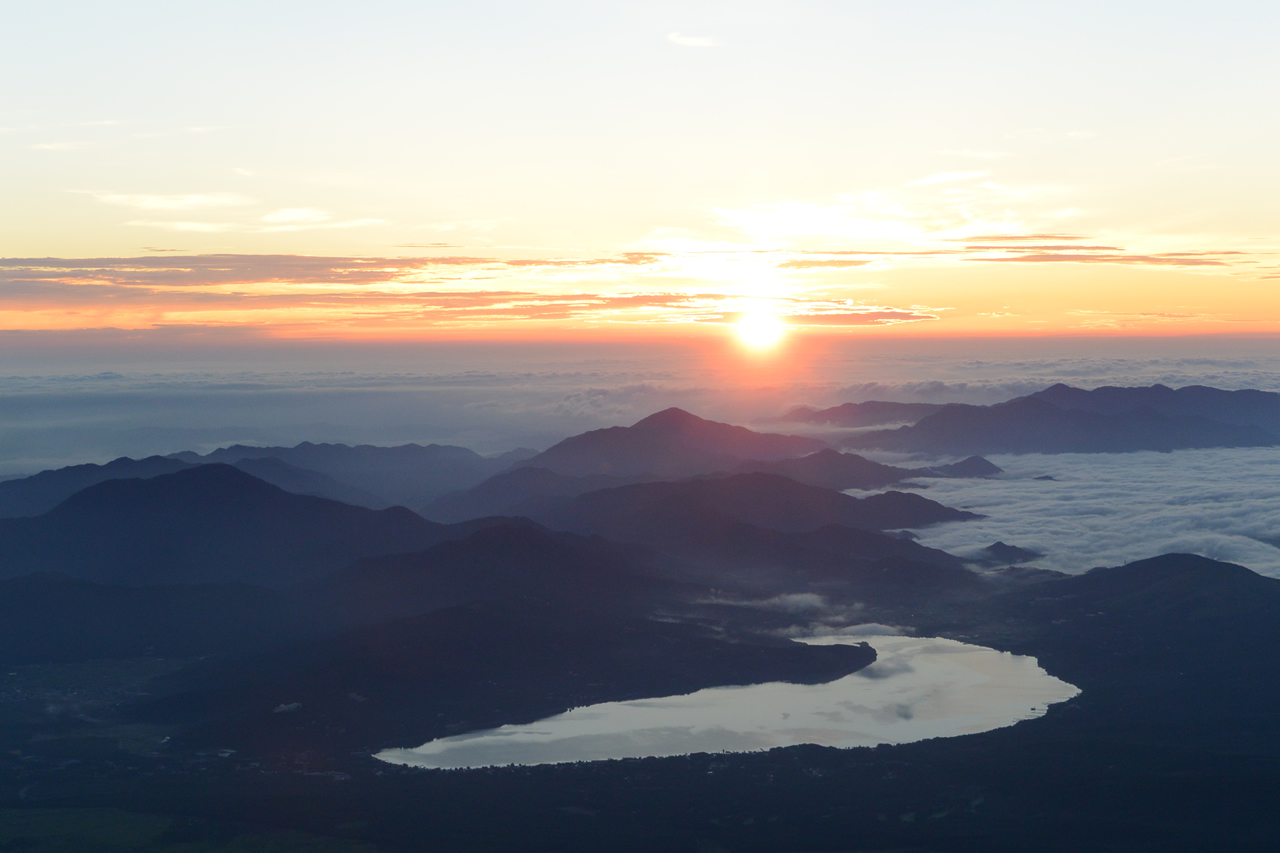
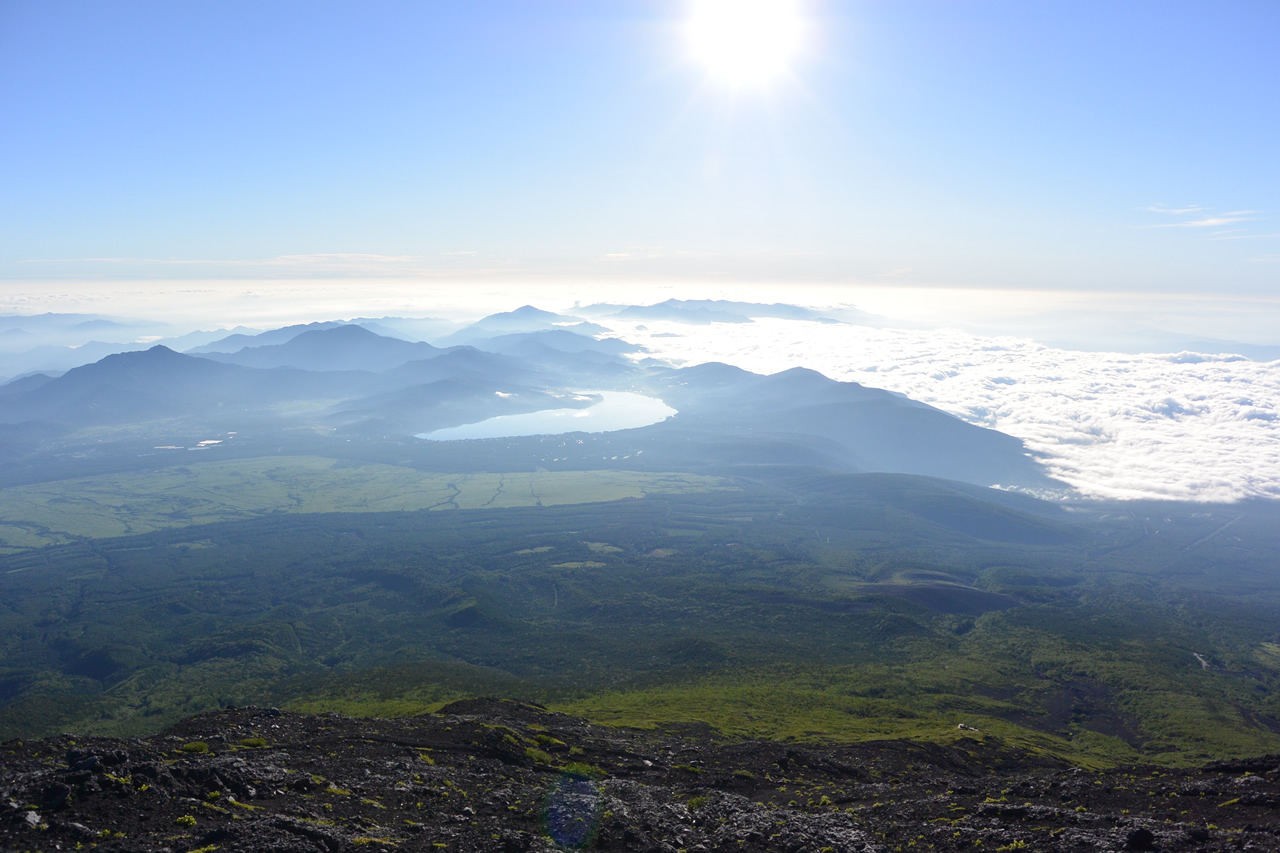
The sleeping area is a 30 foot long room with bunk beds on either side. As you can see from the photo below (not Taiyo-kan) you are given an area 2′ x 6′ to sleep in. Sleeping is co-ed and you are literally right next to your neighbors. Not the most ideal conditions. Taiyo-kan didn’t provide pillows but do provide a sleeping bag and a 2′ x 1′ area to place your backpack at the head of your sleeping area. The 8th Station Fujisan Hotel is at the convergence of the Yoshida and Subashiri Trails so it is always packed to capacity. Taiyo-kan is considered pretty far down the mountain so there were only 5 or 6 other guests. This meant that I was a good 20 feet from my next neighbors (affirming my decision to stop early). The sleeping area had a large heater but I guess it wasn’t cold enough to turn it on 🙁 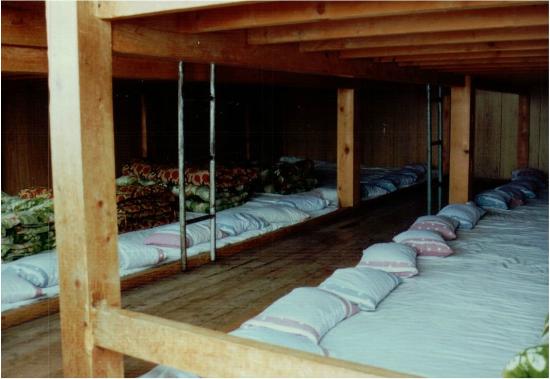 Around 4pm I decided to take a nap. The next problem – sleeping at altitude is a problem. I found that even while sitting around doing nothing I had to remember to breathe deeply …all the time …or my body would forcibly remind me. Going to sleep normally at sea level means slowing your breathing which means your body would forcibly remind you anytime you really dozed off. Sleeping was fitful at best but I wouldn’t be sleeping long anyway. After about 3 hours I was awoken for dinner. The dining area was a traditional Japanese layout with low table and floor seating. As promised dinner was a delicious hambagu (hamburger patty), miso soup, rice and tea. Although my chopstick game was on point I had no idea how to eat hambagu with chopsticks. I had hambagu while in Kyoto but had the advantage of using a fork. There were three other guests that ate with me but they only spoke Japanese. I tried to see how they tackled their hambagu without staring like a stupid gaijin. I knew it was impolite to spear your food with your chopsticks but finally ended up using one of the chopsticks like a knife (I was hungry!). I hung around for awhile watching pre-recorded sumo matches on the TV with the other guests before retiring for the night. Sunrise was scheduled for around 4:45am so I woke up at 4am to get ready. Another reason I was glad I stopped early – a full night’s sleep. The sunrise was spectacular and upon comparing photos and videos to the rest of the group nearly identical to their summit photos (another affirmation for stopping early). It also helped that Typhoon Nangka had just passed two days earlier. It drew all of the usual cloud cover away from the usually cloud covered summit and meant an unusual rain-free climb the entire two days on the mountain. In the twilight before dawn I could see the lights in Yokohama, Tokyo. At this altitude you can literally see the curvature of the Earth. Shortly after sunrise I was called in for breakfast which was boiled tuna(?), miso soup, rice and tea.
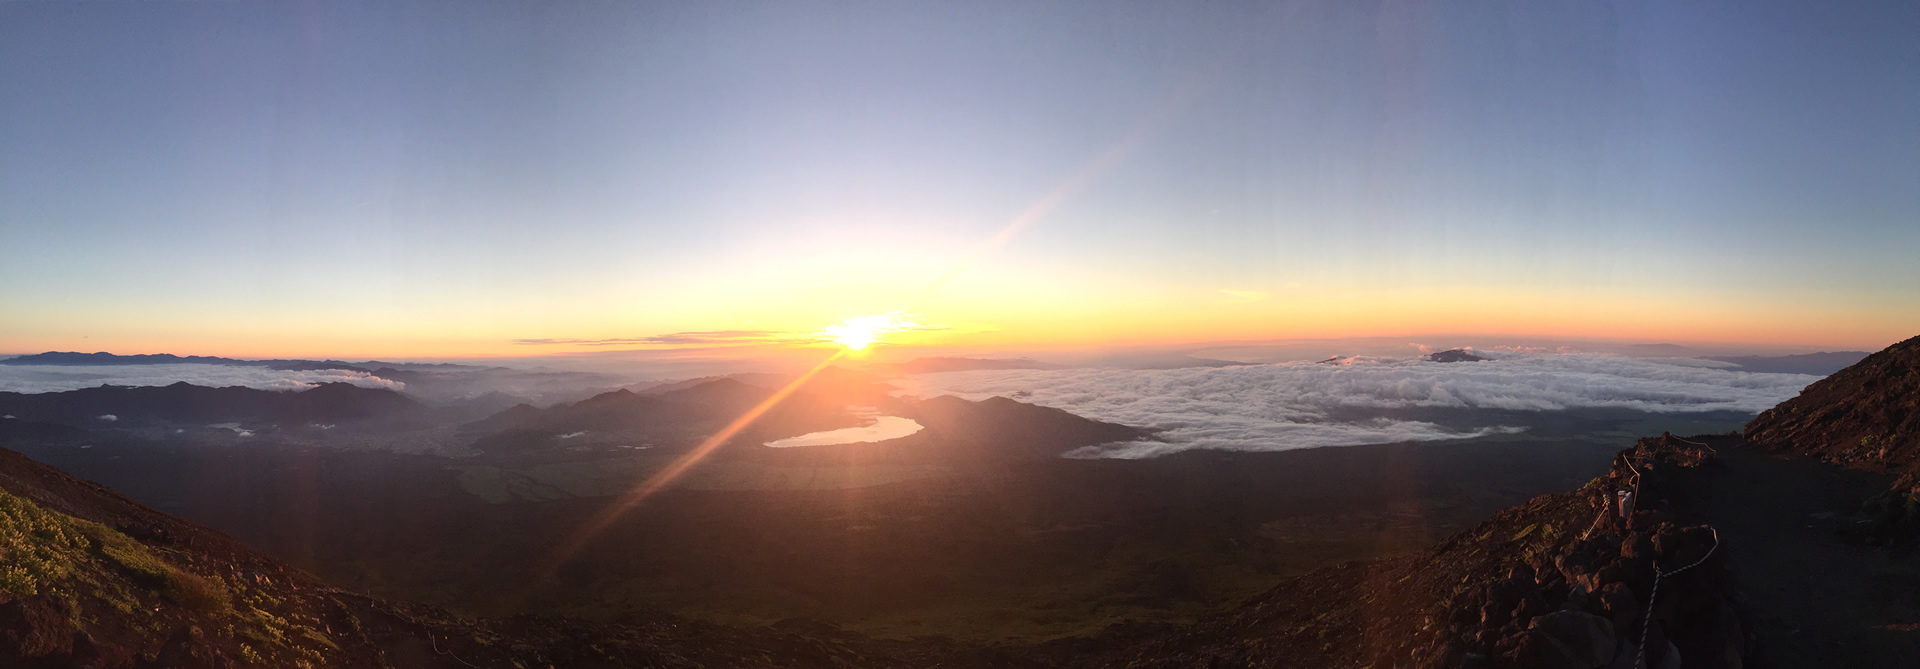
The Descent
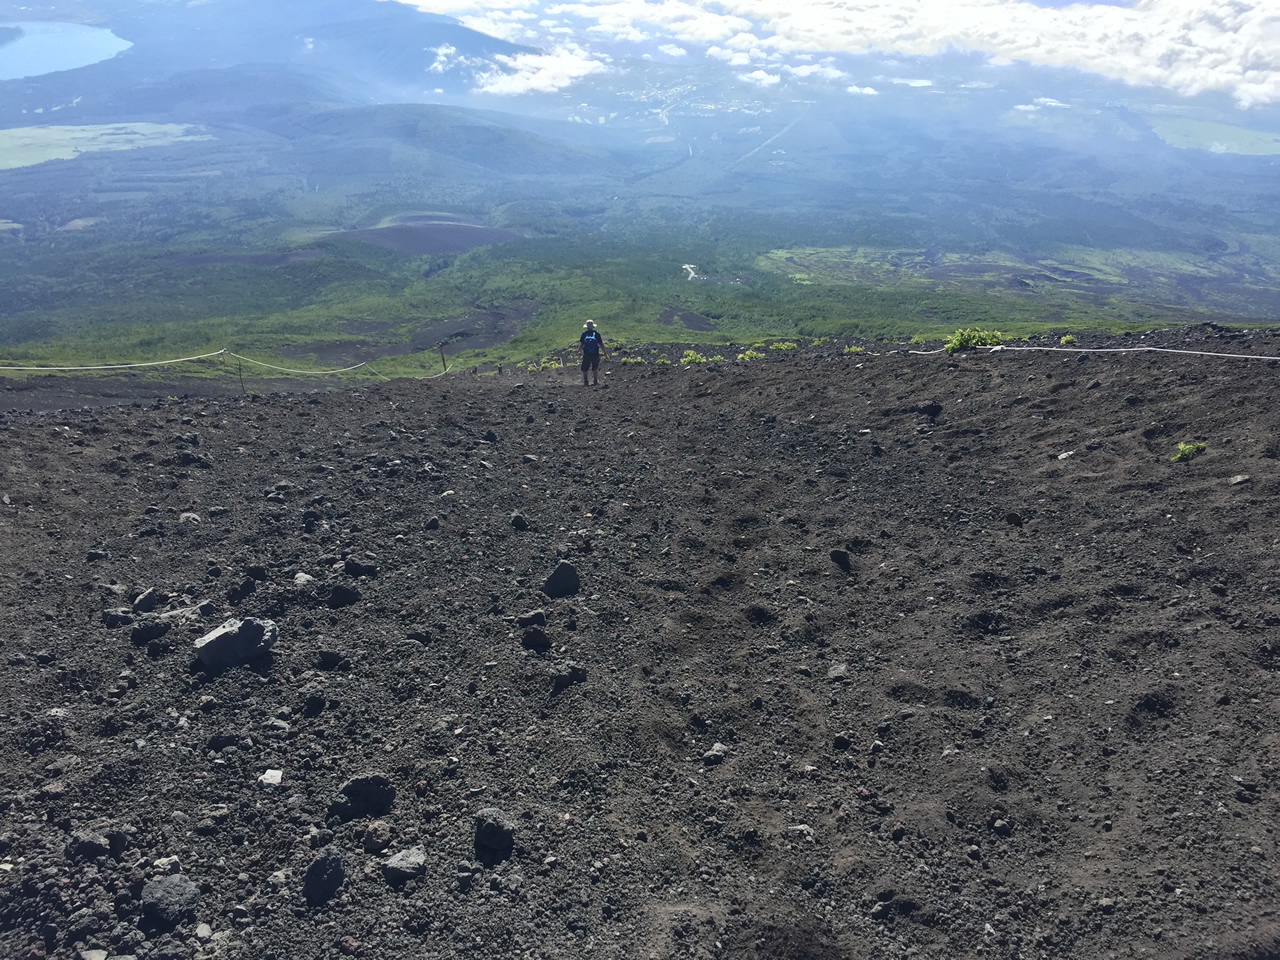
Around 7:30am the rest of the group reached Taiyo-kan and I rejoined the group heading down the mountain. I made sure to put my gaiters on before starting and was grateful as I saw others in the group constantly emptying their shoes of the tiny volcanic rocks which make up the descent path. While the ascent trail tends to be hard packed earth zig-zagging in switchbacks up the mountain, there are usually separate descent trails made up of a thick layer of loose gravel that go down the mountain in a straight line (usually at a 40 degree angle). Also because I wasn’t in a group of more than around four and the lack of people on the Subashiri Trail I didn’t have to worry about the dreaded dust clouds. I had read horror stories of people crying dirt on the descent and sneezing dirt out of their noses for three days after. The altitude still affected me on the descent and it wasn’t until I reached the Sunaharai 5th Station (Yoshino-ya) at 2230m that I could breathe normally again. Thankfully this was the last stop before reaching our starting point the Subashiri Trail 5th Station.
The Verdict
Would I ever climb Mt. Fuji again in order to reach the summit? Nope. Definitely not. Did I enjoy it? In hindsight yes (the weather was excellent and I got some good sunrise photos). Now I know for sure that mountain climbing is not for me or at least I know to stick to the smaller mountains. Sorry Mt. Kilamanjaro 🙁
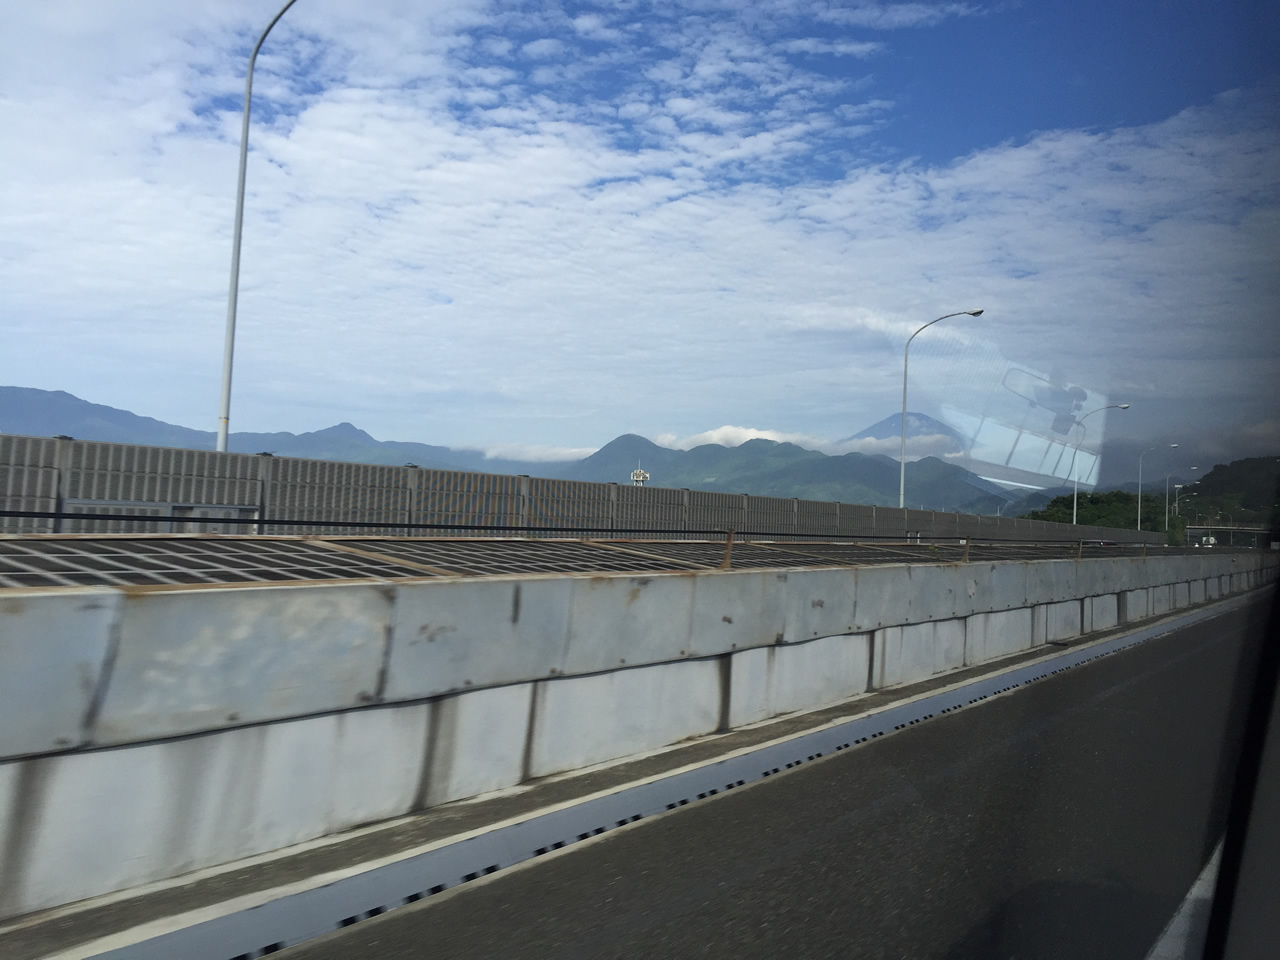
Mt. Fuji
Mt. Fuji summit visible from the highway
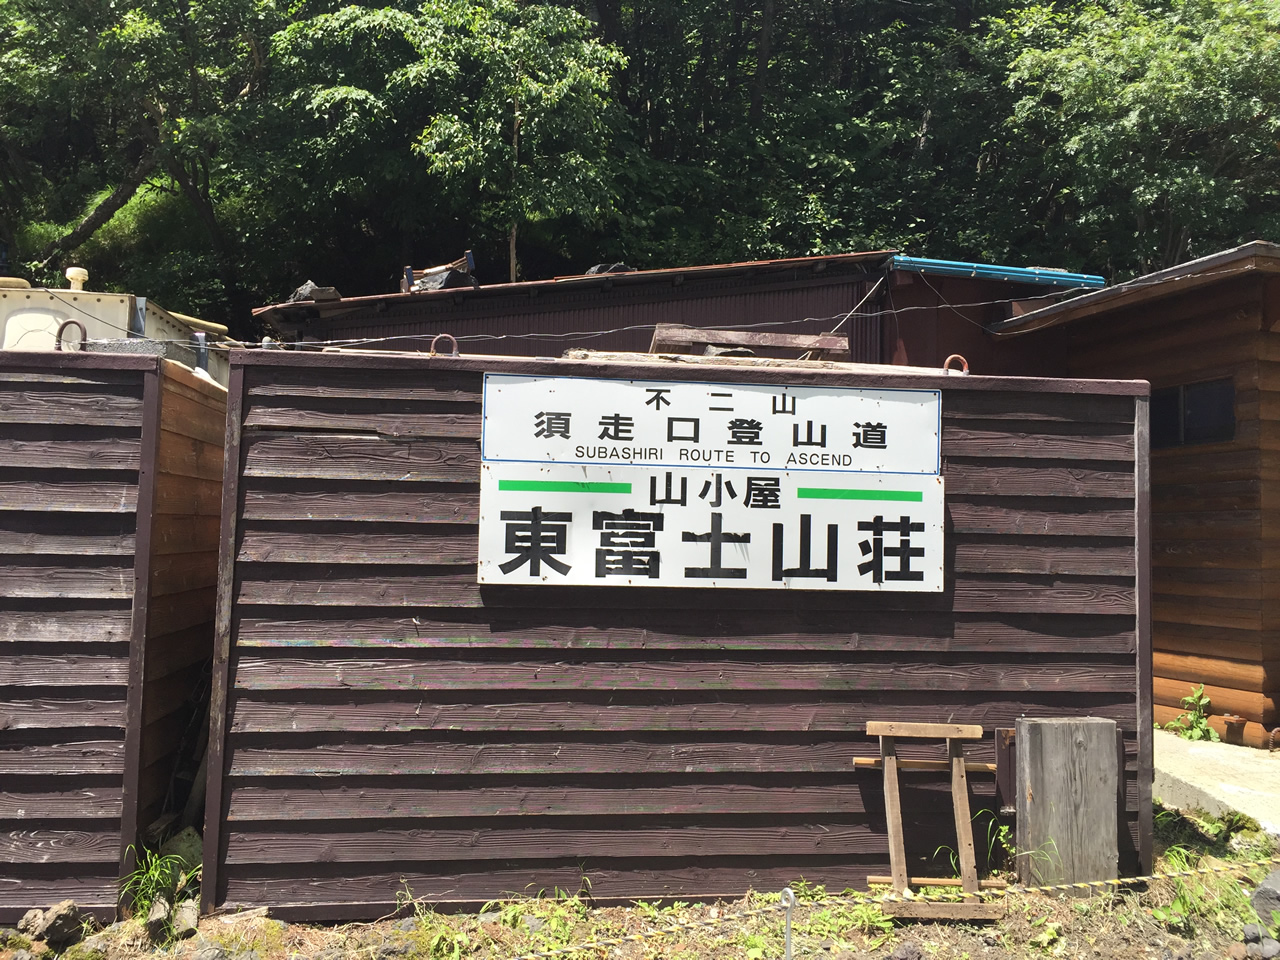
Subshiri 5th Station 03
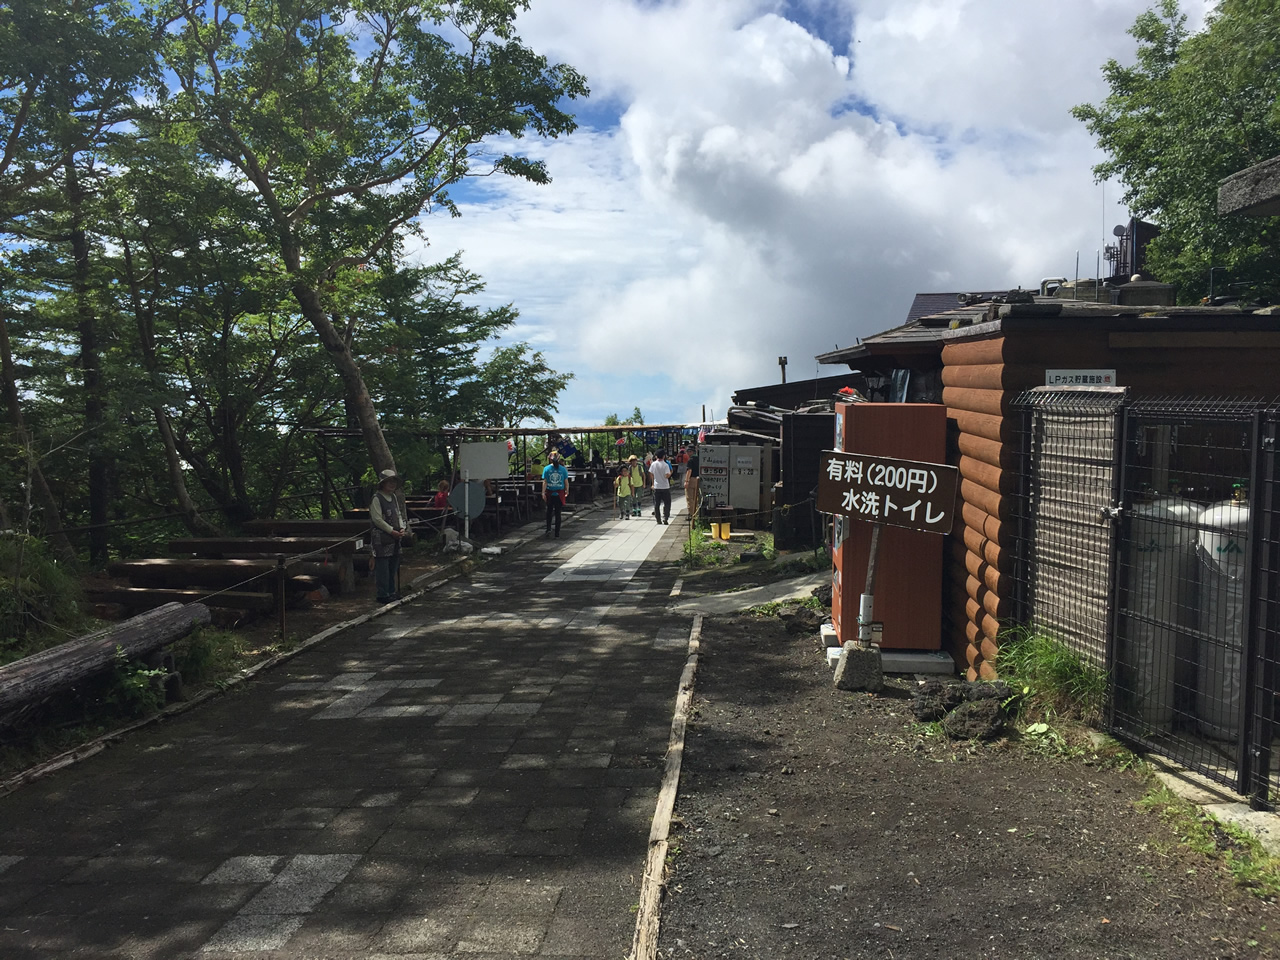
Subshiri 5th Station 01
Subshiri 5th Station 02
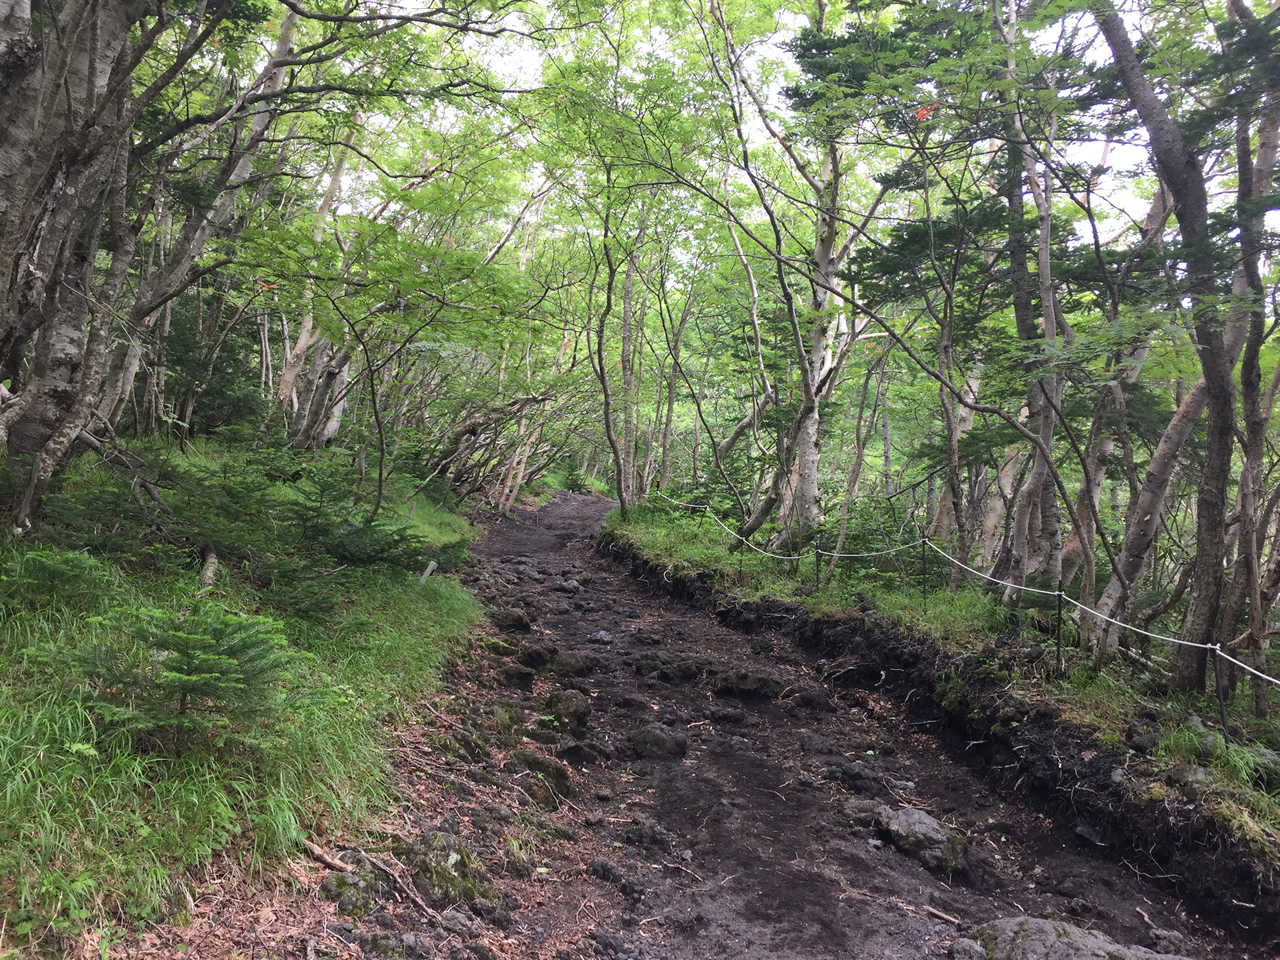
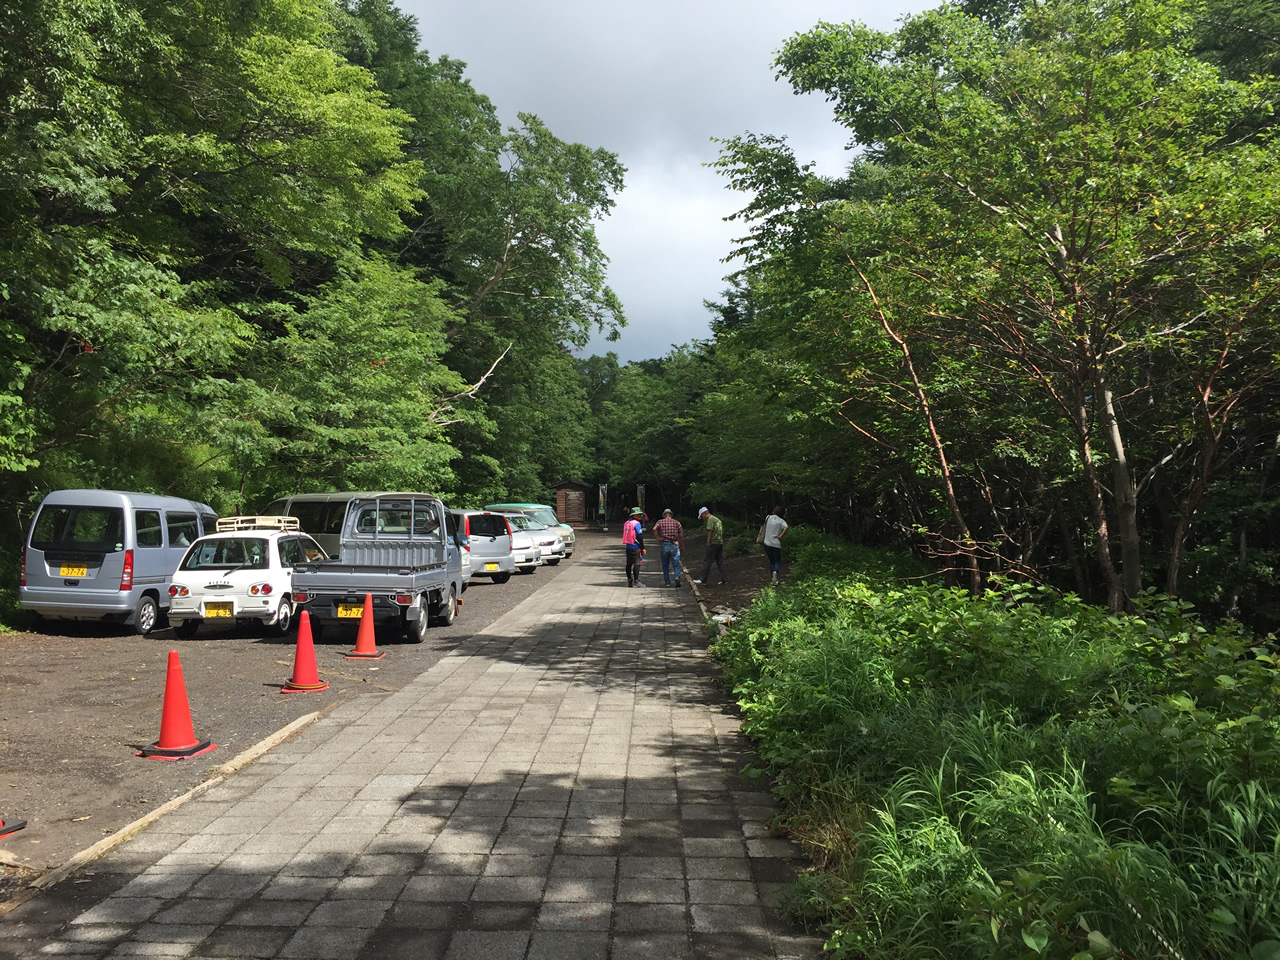
Trailhead
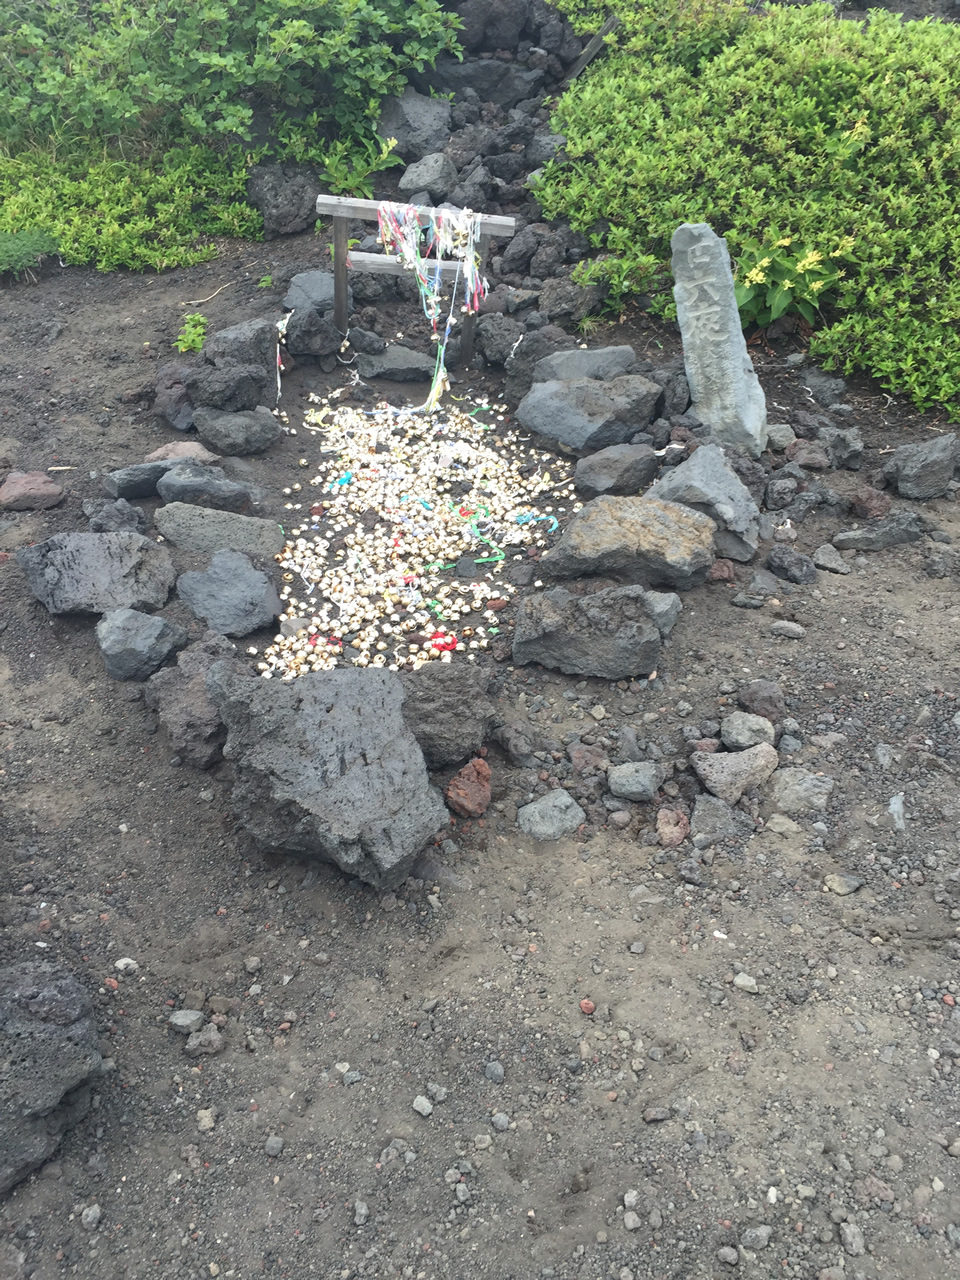
Komitake Shrine
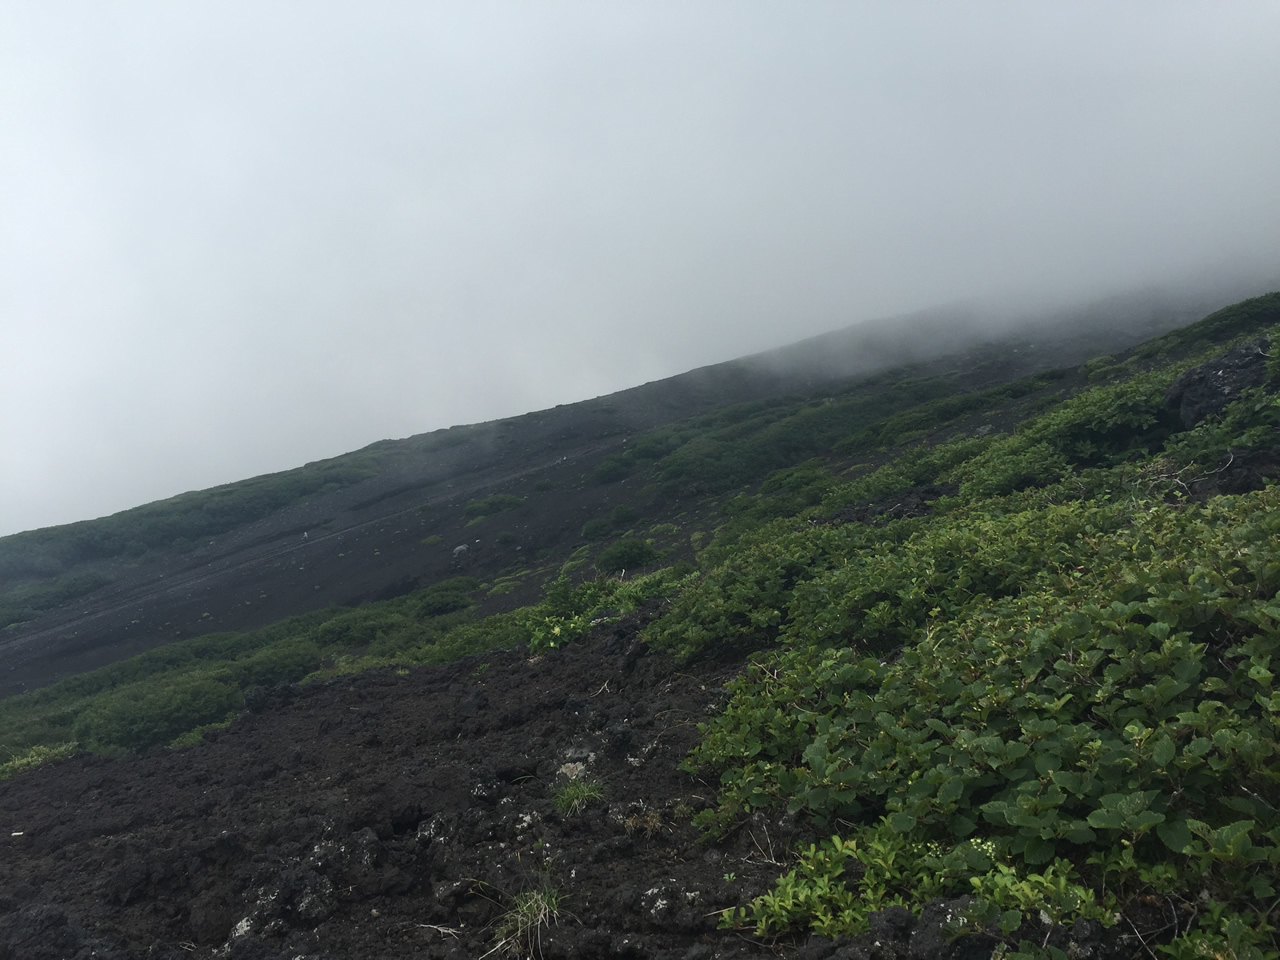
Descent Trail 01
The descent trail as seen from the ascent trail
Nagata Sanso
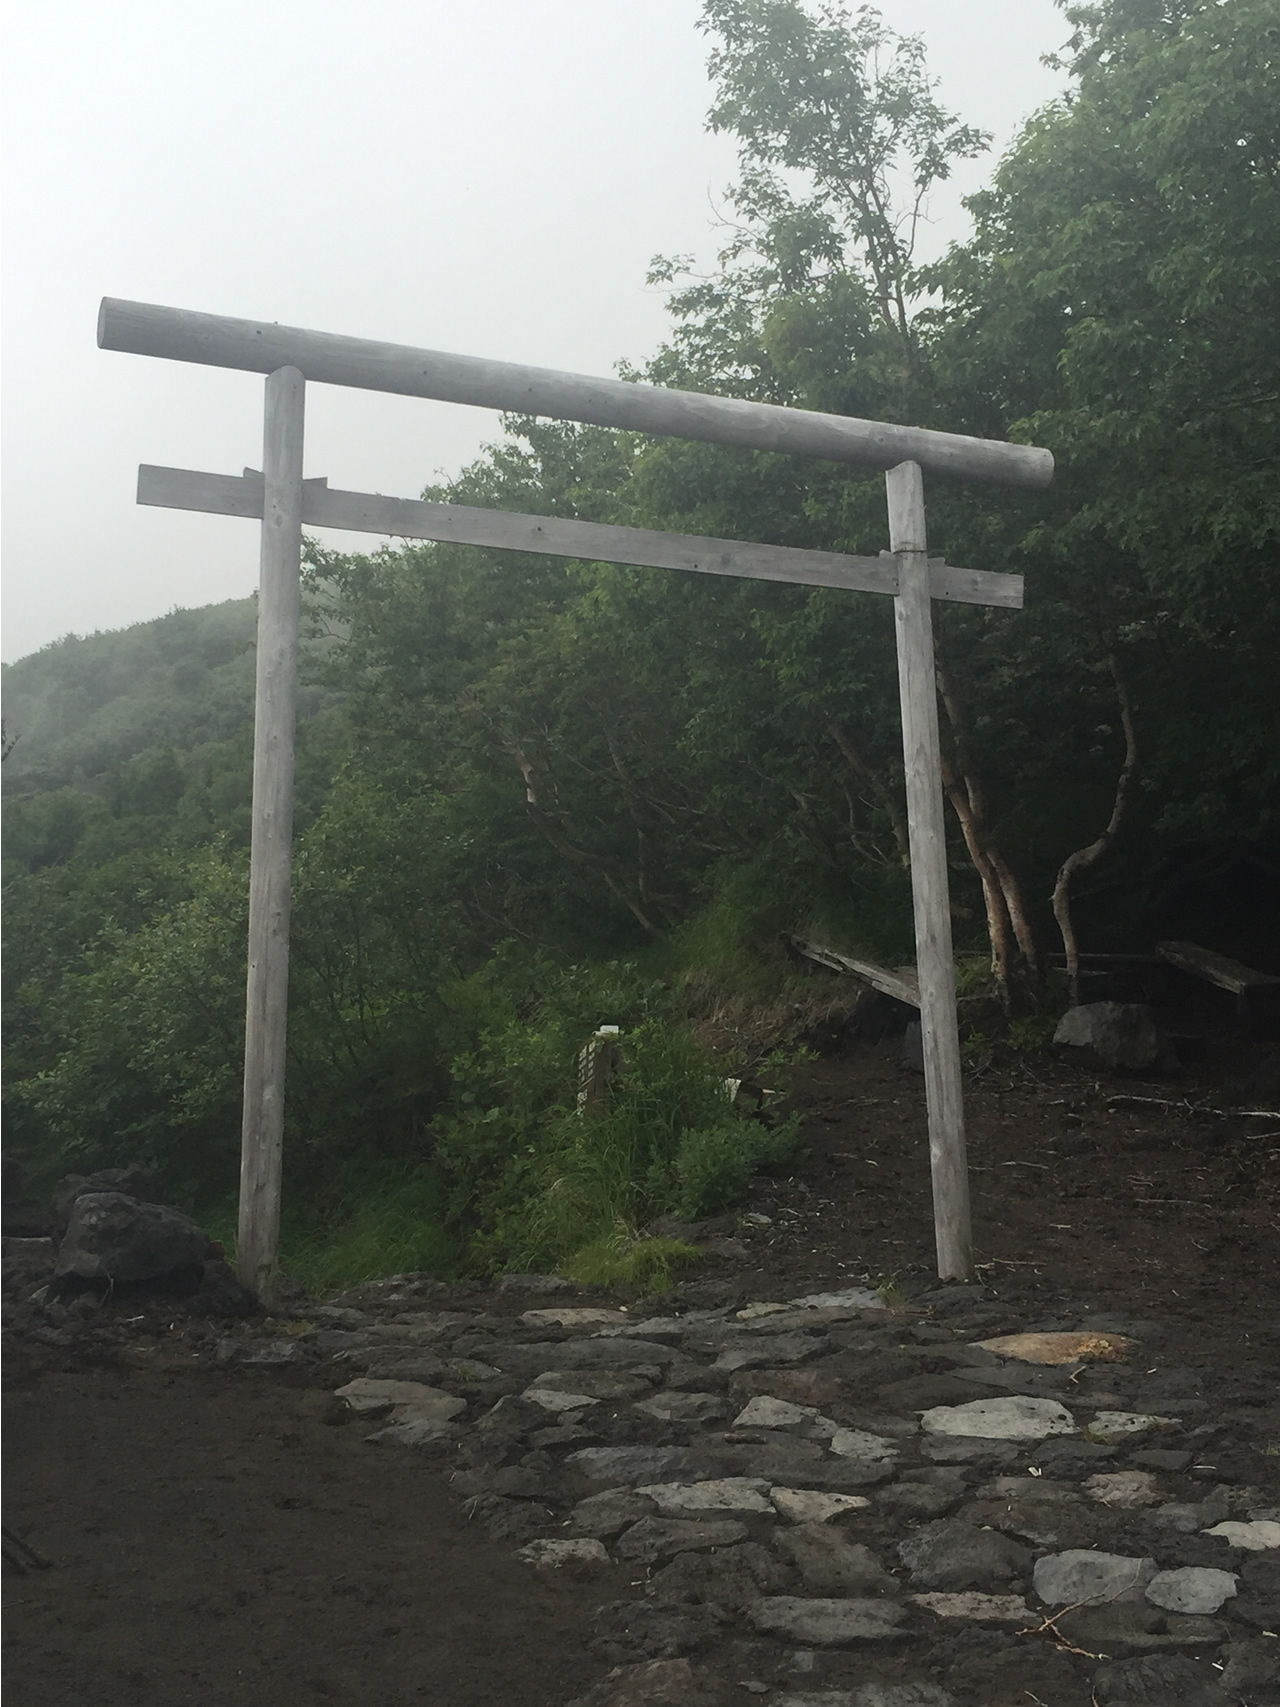
Tori gate at the New 6th Station
Seto-kan
The Old 6th Station

Taiyo-kan 02

Taiyo-kan 03
Taiyo-kan 01
Summit
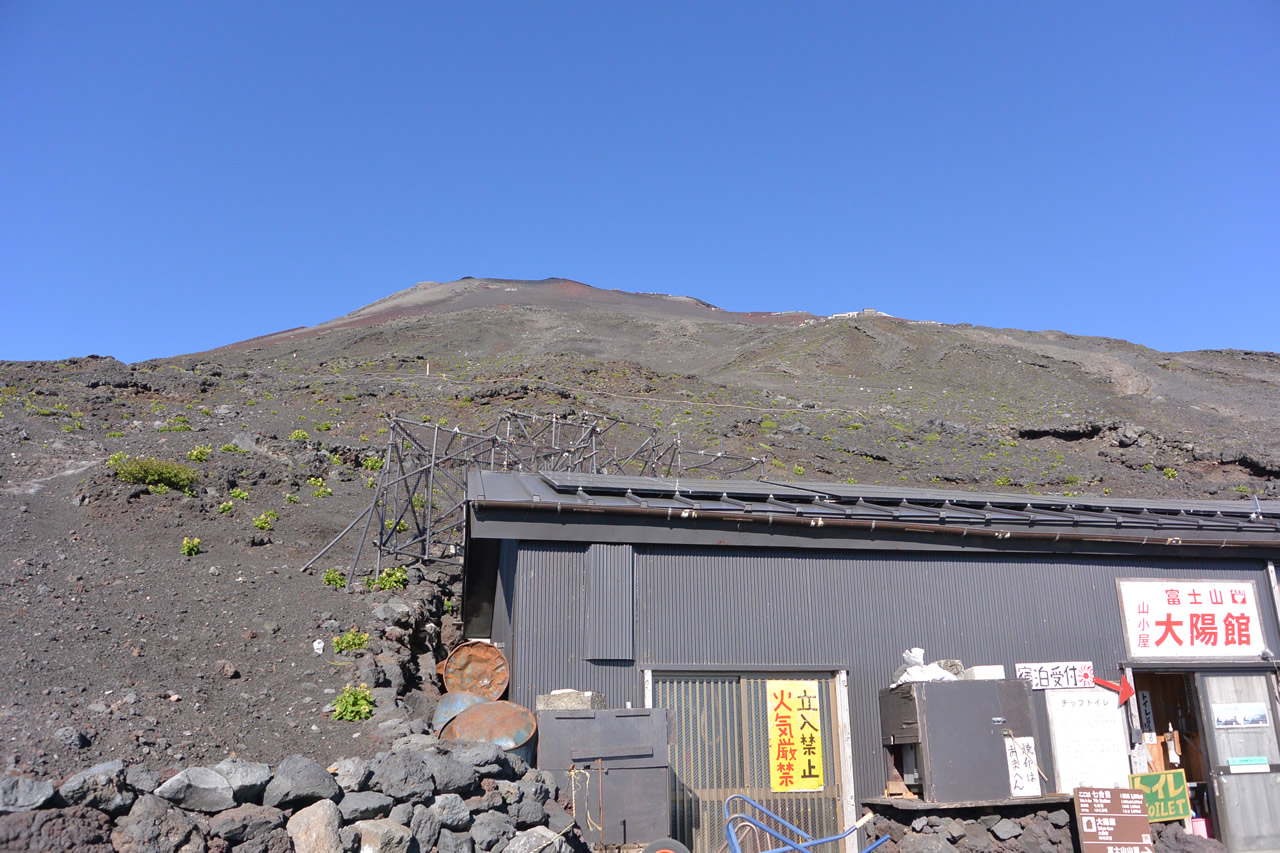
Mt. Fuji summit from Taiyo-kan (so close yet so far)
Sunrise 01
Sunrise 02
Sunrise 03
Descent Trail 02
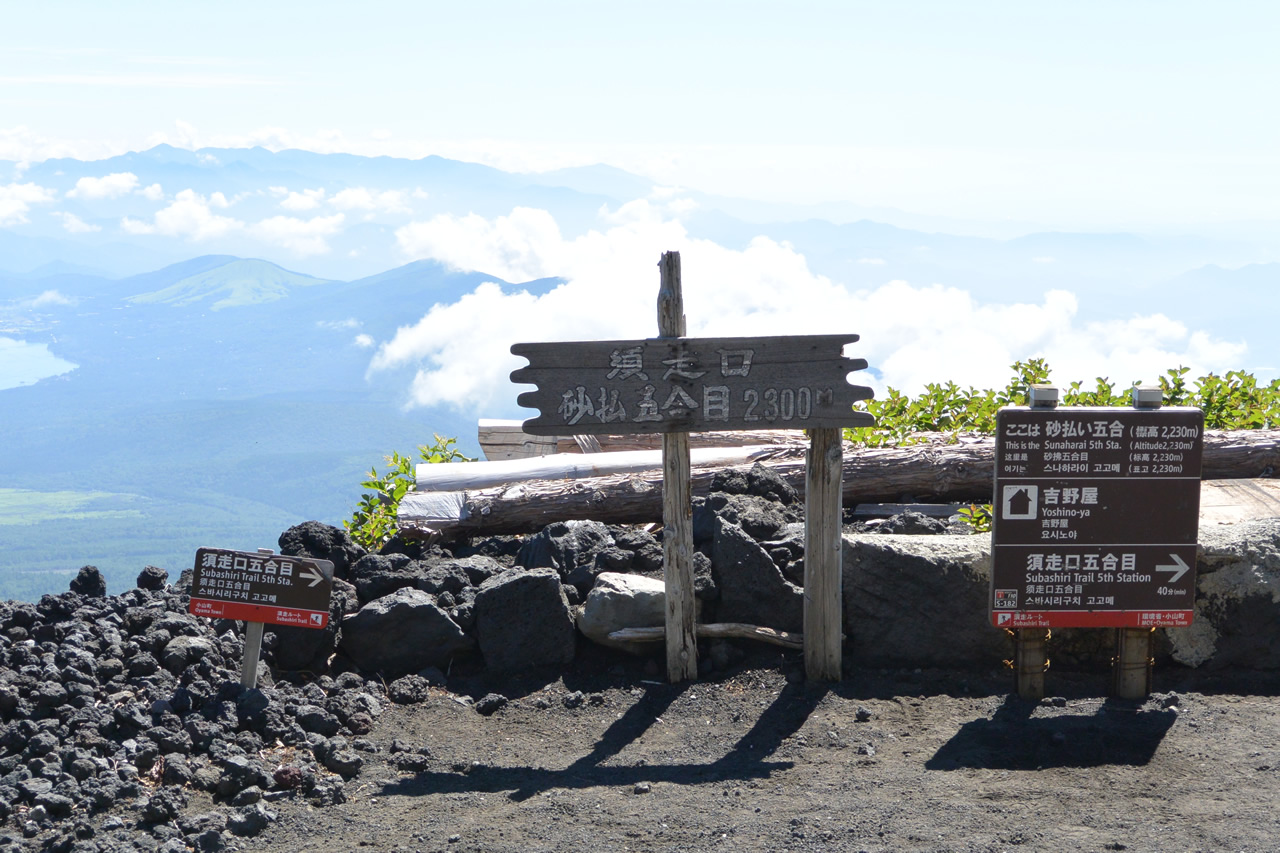
Yoshino-ya 02

Yoshino-ya 01
The final tori gate