At least half of my time spent in Japan was pre-arranged tours while the other half was independent travel and me wandering around Japan. The easiest and most inexpensive way to get around the massive megalopolis that is Tokyo is by train. While the following is by no means comprehensive it provides a few hints at how I was able to easily travel around Tokyo without getting lost. The three key things I would recommend using to accomplish this are:
- Google Maps
- SIM card with data plan
- Suica card
Google Maps
The most valuable tool you will need is Google Maps. Just plug in your starting point, select directions and then enter your destination. Google Maps has a handy train tab you can select to show the train route to your destination. While Google won’t guarantee the schedule I found it to be very accurate and up-to-date. You can even select the time to see when specific trains are leaving. In the output you will see which train station you need to depart from (in some cases even the platform you need to go to) and which train stations you will pass through on your way to your destination station. Japan trains arrive and depart within a minute of their scheduled times so the times listed on Google Maps are very accurate. There are a number of different railway companies that operate in Tokyo so in some cases you may need to switch to a different train line. These changes are also listed in the Google Maps output. Lastly Google Maps will also show you the cost of your trip in yen.
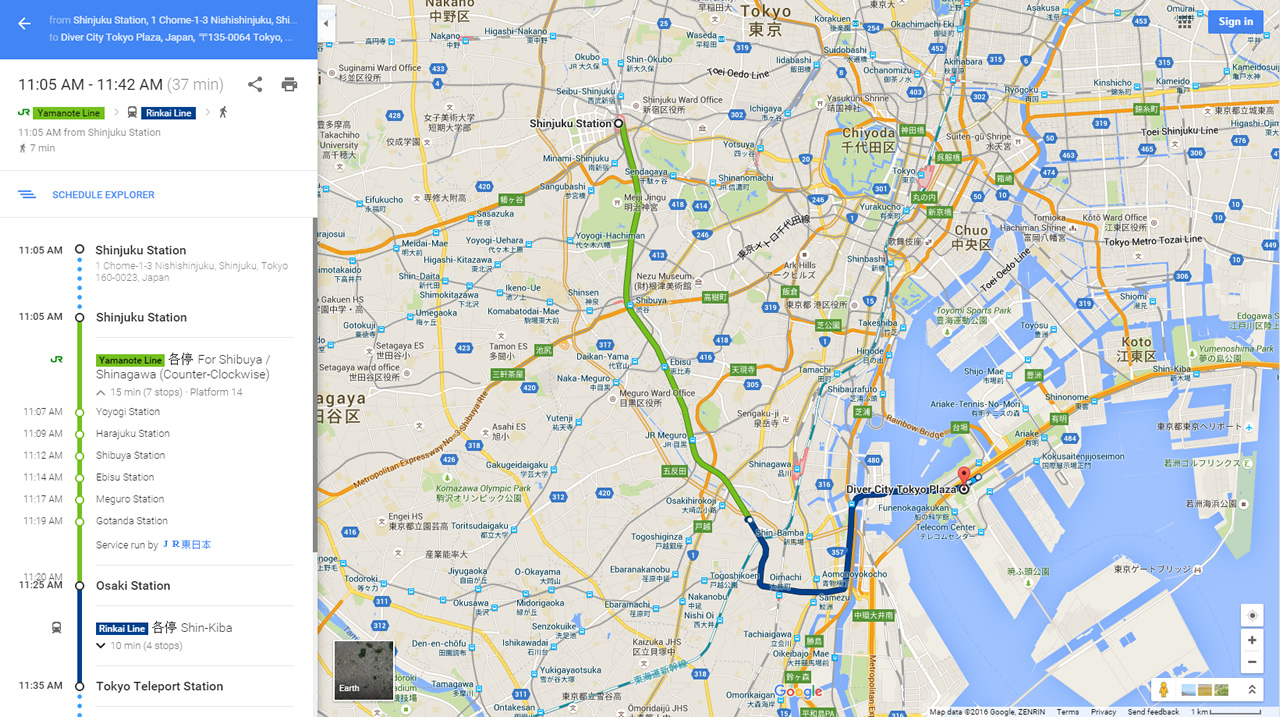
Once you have the route and schedule you need to take you can produce a printout as a quick reference of where you need to go.
SIM card
The second item I would recommend is getting a local SIM card with a data plan for your phone. One of my work colleagues who had been to Japan told me how dense the streets and side-streets are in Tokyo and how he became easily lost. To avoid this I decided to get a SIM card so that I could use the GPS and map function on my iPhone to know exactly where I was.This helps in the walking portion of reaching your destination. In addition you can bring up Google Maps to have your train route details handy. The SIM card also comes in handy for keeping in touch via WhatsApp, Skype or SIP phone. While Japan doesn’t have many public Wifi access points they have excellent mobile coverage (even on Mt. Fuji!).
I chose a 14-day data only SIM card rental from cdJapan. cdJapan offers unlimited data at 4G speeds (~200Mbps). You can download up to 110MB a day at 4G speeds before they choke your speed down to 200kbps. A 14-day plan only cost me about $28US. I had the company deliver the SIM card directly to my hotel and was able to pick it up on check-in. Because it was a rental I needed to return the SIM card. This was also easy as they include a prepaid envelope which I dropped in a mailbox at Haneda Airport on my departure.
Suica card
In order to use the train you obviously have to pay for the ride. When you walk into the train station you will typically see a map of the train lines posted above machines where you can buy train tickets.
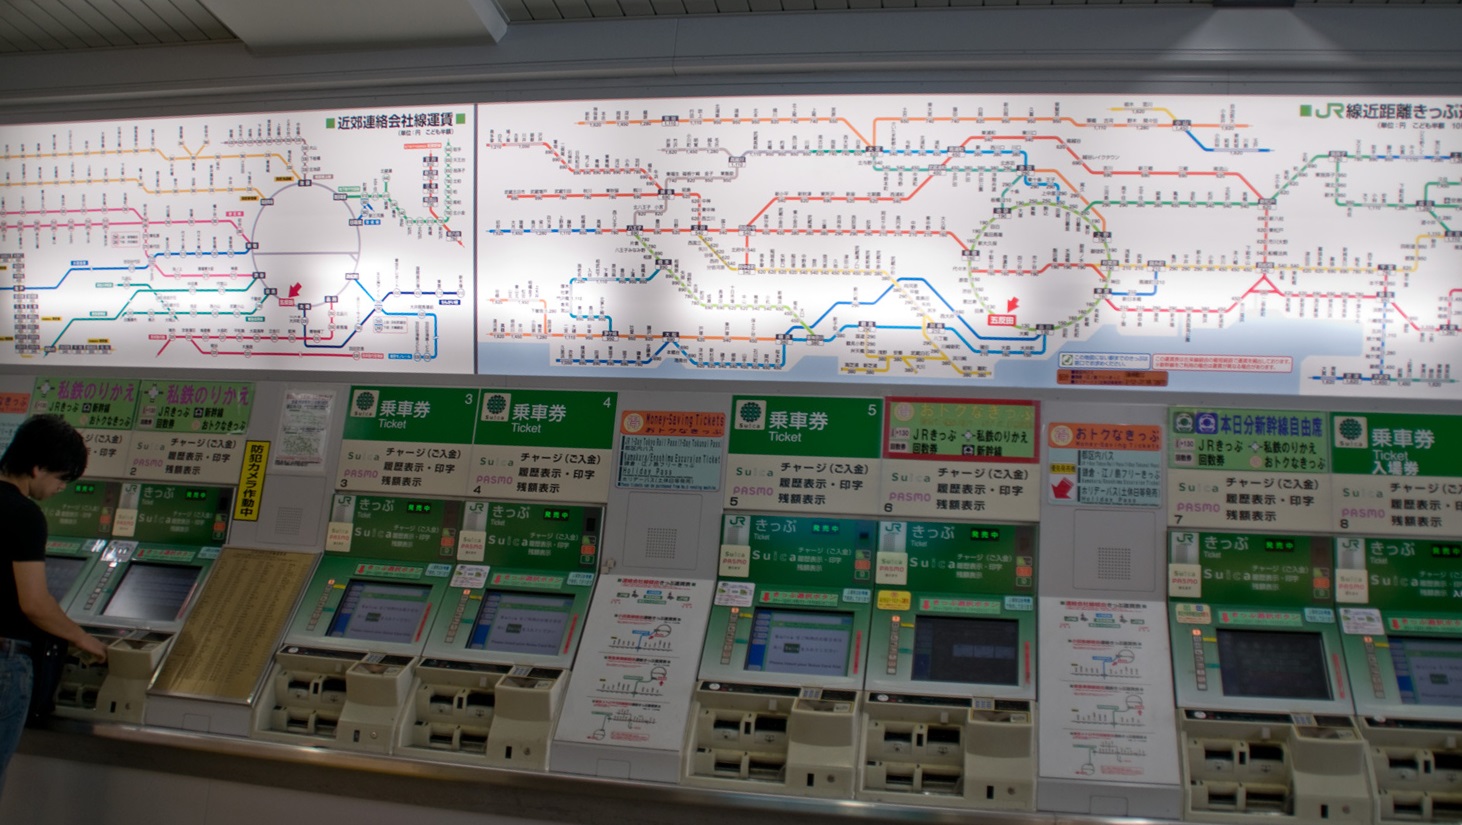
Needless to say this is extremely overwhelming and until you have used the train a few times you won’t have a clue what you are looking at. In addition you need to figure out how much your ride will cost. You do this by looking at the destination station and the price listed below it. You then use one of the ticket machines to purchase a ticket in that amount.
My advice and the advice of others on the internet is to avoid all of this especially if this your first time using the train. For the most part Google Maps will tell you where you need to go and also how much it will cost. Rather than continually buying train tickets it is much easier to purchase a Suica card.
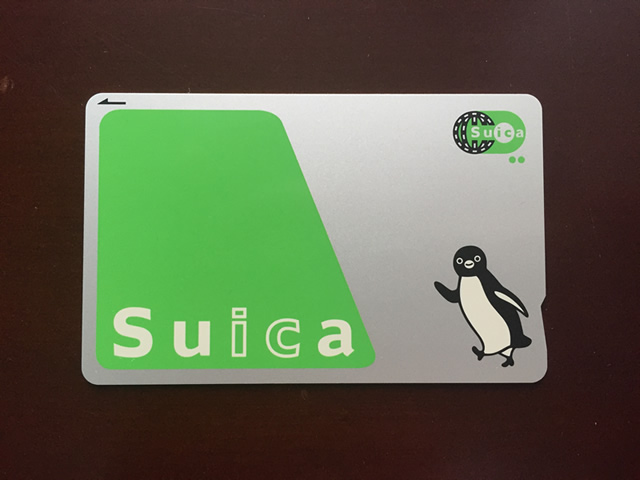
The Suica (Super Urban Intelligent CArd) is a prepaid smart card which can be used to pay for your train ride (or as payment at certain stores or vending machines). I used Google Maps to estimate how much all of my train rides would cost in advance so that I could put enough money on my Suica to cover all of my travel while in Tokyo.
First you need to purchase a Suica from the correct vending machine. Not all ticket machines allow you to purchase a new Suica (some will only allow you to add money to it). Just for reference you can find one at the eastern entrance of the Shinjuku train station. The process is pretty straight forward. First press the English button on the screen to change the prompts to something a little easier to read. Then select New Suica and then just get the regular Suica. You can get a personalized MySuica so that you can get it returned if you lose it but that means entering a whole lot of extra information. The Suica costs 2000 yen of which 1500 yen is usable on the card right away for payments. I estimated that I wouldn’t need more than 1200 yen for all of my travel so I didn’t need to add any extra money to the card. If you do just swipe your new Suica in the machine and select charge to add a little extra. You can see a simple video of the process below.
Putting it Altogether
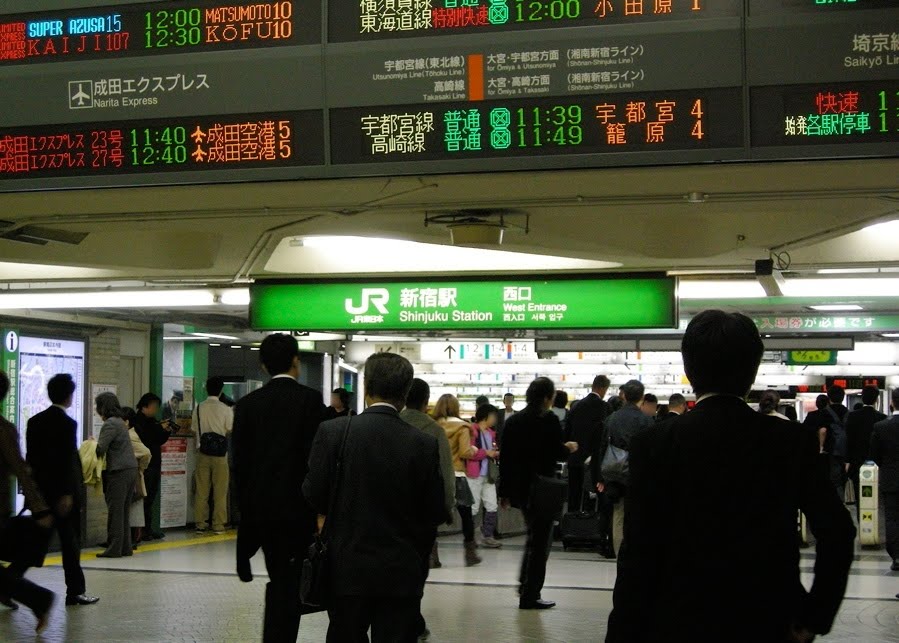
Once I arrived in Japan I picked up my SIM card at the Keio Plaza Hotel in Shinjuku and along with my Google Maps printouts was ready to tackle the Tokyo train system. My first trip was to get to Odaiba in Tokyo Bay to see the life-size Gundam RX-78-2. I needed to first get to Shinjuku Station which is a few blocks away. There is actually a completely covered underground walkway linking Keio Plaza Hotel to Shinjuku Station. I actually downloaded the directions from this blog, however the directions were for the opposite direction (Shinjuku Station to Keio Plaza Hotel) so I ended up walking above ground. Once I arrived I searched around for awhile to find a machine to get a new Suica.
Japan is a pretty easy place to get around for English speakers. All announcements and signage in train stations and on trains is displayed in Japanese, English, Chinese and Korean. There is usually a train attendant near ticket machines to assist you and many will speak some English. The first thing I needed to do was to find my platform and train departure time. Google Maps will tell you which train line and route to look out for on the streaming billboards above the ticket gateways.
Once you locate the correct ticket gate you will also know which platform you need to go to. Now just swipe your Suica card at the ticket gate and walk through. The Suica is a contactless card so you only need to bring it close to the sensor to activate it. You can even keep it in your wallet if you like.
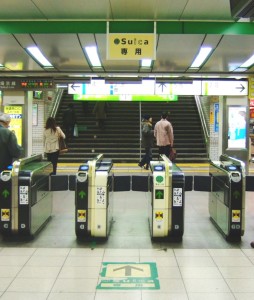

An interesting sidenote regarding Japanese ticket gates – unlike other countries the gates are open by default and will only close blocking your path if there is something wrong (like not enough money on your ticket or Suica). This allows traffic to flow more efficiently, considering stations like Shinkjuku Station can process over 3 million passengers a day!
The way the ticket gates work is that when you scan your ticket or Suica at your starting point it takes note of where you are (you may see it flash a default payment amount although it doesn’t deduct anything yet). When you pass through the ticket gate at your destination it deducts the correct amount off your Suica (or takes your ticket and keeps it).
For my first trip to Odaiba I had to change train lines midway through. Again this was simple and I just repeated the process of finding a billboard listing the line, route and platform I needed to go to. The return trip is exactly the same but just in reverse so I didn’t need to reprint a different Google Maps route.
I traveled on the train on three other occasions with similar ease. I did have one hiccup when I thought I would get fancy and try and take an express line to reach my destination. Express lines will skip over four or more stops allowing you to get to your destination faster, however they only leave at certain times. I was racing to catch one of these express trains before it left and not only did I not get on the correct train, I got on the train going in the opposite direction. This wasn’t an issue as I simply hopped off the train at the next stop and crossed to the other side of the platform to catch the (non-express) train in the right direction. My advice – take your time and pay attention to which train (and direction) you should be boarding.
Additional Advice
- When you get to the platform wait in line at the designated spots. Japanese are extremely orderly and organized and with the large numbers in Tokyo this is understandable.
- It is considered bad manners to talk loudly or on your cellphone while on the train.
- Avoid morning rush hour! Between 6am-9am trains are super crowded and you may in some cases have first hand experience with “train pushers” (oshiya) whose job it is to jam you on that train. Getting off the train during these times is just as difficult. Evening rush hour (5pm-7pm) is less of an issue since most workers have staggered times for leaving work or socialize after work.
Kyoto by Train?
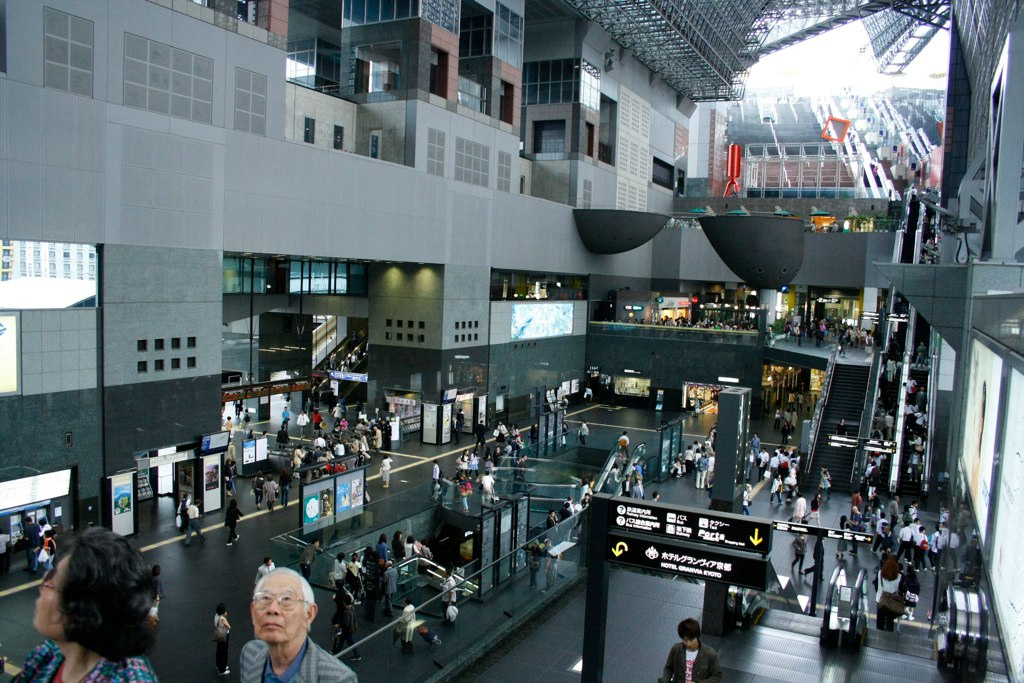
Before tackling the Tokyo train system I had a disastrous dry run in Kyoto. I was attempting to visit Toei Studio Park (like a Japanese Universal Studios) but could not locate the platform. I spent an hour and a half searching throughout this immense train station covering 6 miles in my effort. It probably didn’t help that I was carrying around 20 pounds in my knapsack at the time. Kyoto Station is the second largest train station in Japan and one of the largest buildings in Japan. The 15-storey building houses a hotel, shopping mall, department store and movie theater. I spoke to a few locals later and they admitted that the station is ridiculously large and can be difficult to navigate.
I did have a good experience on Japan’s bullet trains (shinkansen) traveling from Tokyo to Kyoto and back again. Of course I had JTB Travel to organize this aspect for me including buying the tickets, escorting me to the platform, meeting me during train changes, etc. These maglev (magnetic levitation) trains can reach speeds up to 200mph but run smooth as glass. I barely felt the acceleration on these high speed trains.